Warframe · Rhino · Starter loadout
Rhino starter build: protection, Roar and a capacity budget that fits
On this page
Start with Intensify, Continuity and Streamline as your ability-focused core. Use Iron Skin for protection, Roar for the damage-buff role, and keep energy available for the next dangerous encounter. Add Flow or Stretch only after checking what the current loadout lacks and what actually fits.
This plan uses standard Mods. It does not require Prime equipment, a specific Augment or a complete collection of endgame upgrades.

Make the abilities do different jobs
Iron Skin supplies Overguard; Roar increases nearby Warframes’ damage; Rhino Stomp supplies crowd control. Keep those roles distinct when diagnosing a failed mission. A damage buff is not a replacement for protection, and extra protection is not a reason to ignore an objective.
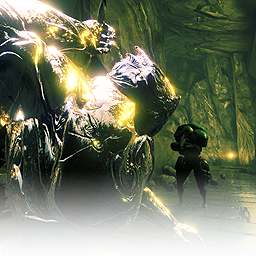
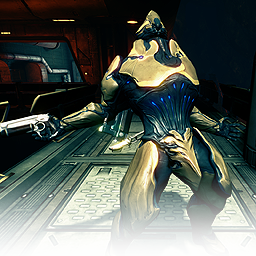
The Mod core and two upgrade branches
Intensify + Continuity + Streamline is our starting recommendation: invest in the ability stats before trying to fill every empty slot. The table shows the standard versions’ fully ranked values from Digital Extremes’ public export. Beginner and other variants can share a displayed name while having different ranks and effects; inspect your actual card.
| Standard Mod | Maximum-rank card effect | Drain before slot polarity |
|---|---|---|
| Intensify | +30% Ability Strength | 11 |
| Continuity | +30% Ability Duration | 7 |
| Streamline | +30% Ability Efficiency | 9 |
| Flow | +100% Energy Max | 9 |
| Stretch | +45% Ability Range | 9 |
Choose Flow when you want a larger energy reserve. Choose Stretch when coverage is the problem. Do not automatically install both at full rank. These are alternative next investments, not permission to exceed capacity. Flow’s larger maximum is not a source of energy regeneration.
If protection is failing, use the ability’s current Arsenal preview and the mission’s actual damage pressure to evaluate changes. This page does not invent an Iron Skin absorption formula or promise a fixed Overguard total from these Mods.
A concrete capacity calculation
Without any matching-slot discounts, fully ranked Intensify costs 11, Continuity 7 and Streamline 9. Their combined drain is 11 + 7 + 9 = 27. If the Upgrade screen shows 30 available capacity, that leaves 30 − 27 = 3; it does not leave enough for a fully ranked Flow costing 9.
All five listed Mods cost 11 + 7 + 9 + 9 + 9 = 45 before polarity. Count the displayed loadout rather than copying a picture of eight occupied slots. These examples assume the stated available capacity and no discounts; they are not a claim that every account starts with the same capacity.
Matching an ordinary Mod’s polarity reduces its drain, while an installed Orokin Reactor increases a Warframe’s capacity. An Aura can also affect the budget. Use the displayed total after those effects; do not count an empty slot as free capacity. Avoid committing Forma simply to reproduce someone else’s final layout before your own target build is settled.
Build it in stages
- Open Rhino’s Upgrade screen and read available capacity, existing polarities and the exact versions of your Mods.
- Fit the three-Mod core at ranks you can support. Recheck the total after each Fusion upgrade; ranking a Mod changes its drain.
- Review the ability previews. Record what changed before moving several Mods at once.
- Play the mission with a clear role: maintain protection, use Roar where the damage window matters, and reserve control for pressure near the objective.
- Pick the next branch from the observed problem. Energy reserve, coverage and surviving damage are different issues.
- Only then plan a higher-capacity configuration or specialized upgrades. Keep the earlier configuration available instead of replacing everything at once.
Three mistakes that waste the setup
Filling every slot at low rank
Compare the useful effects you can actually afford. An occupied slot is not evidence that the loadout supports its main job better.
Adding capacity and expecting damage to appear
Capacity makes room for Mods; it is not itself a damage stat. Identify which Mod and ability interaction is supposed to improve the result.
Copying an endgame loadout without its conditions
A picture may rely on different polarities, special variants, a Reactor or other equipment. Copy the functional priorities first, then audit the cost of every change.

Sources and review date
Reviewed October 17, 2026. Ability roles come from Digital Extremes’ Rhino page. Mod names, standard variants, maximum-rank effects and base drain come from Digital Extremes’ public Mod export; each arithmetic input is listed above. Capacity, Fusion, polarity, Reactor and Aura rules are explained in the official Mods Guide. The sequence and upgrade branches are editorial recommendations; no mission-clear time or endgame damage result is asserted.