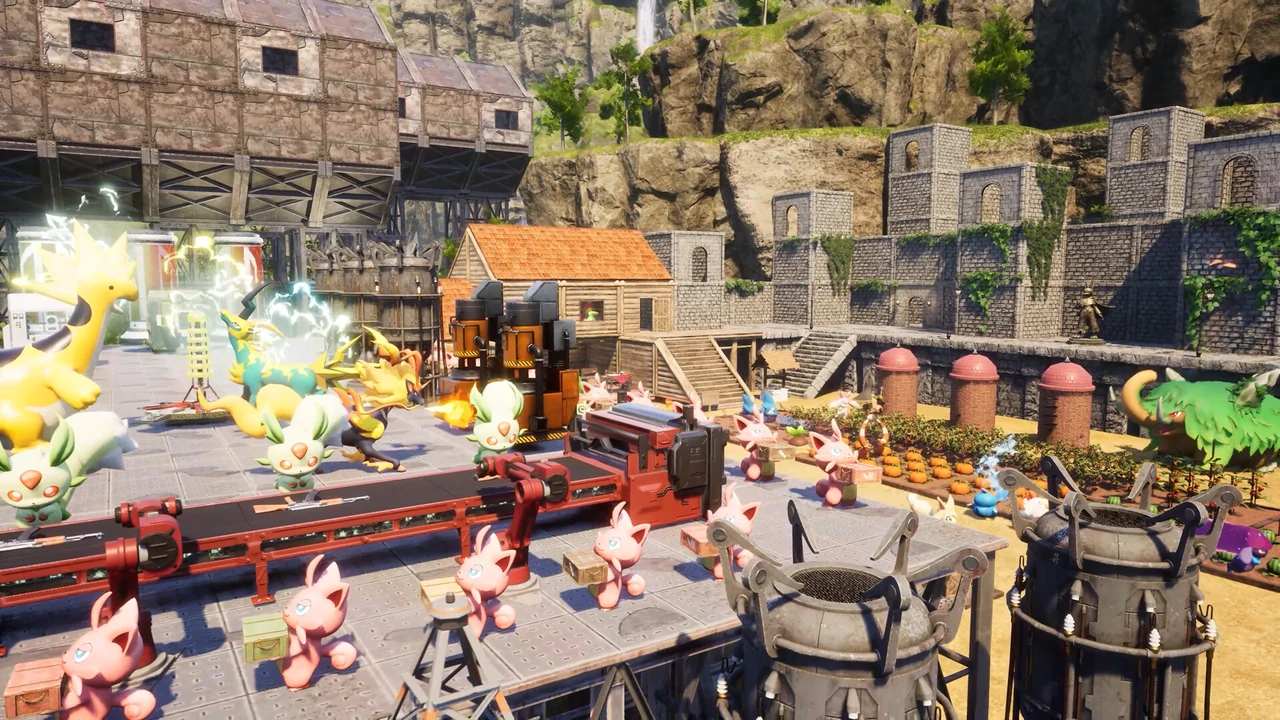
Palworld · Base Optimization & Tier Lists
Best Base Pals Tier List: Top Workers & Hitbox Physics
On this page
- Work Suitability Scaling & Task Prioritization
- Mining & Handiwork Tier List
- The Monitoring Stand: Custom Task Prioritization
- Farming Triad: Planting, Watering & Gathering Ratios
- Transporting Physics & Hitbox Collision Analysis
- Base NavMesh Architecture & Structural Clearance
- The Nocturnal Advantage: 24/7 Base Productivity
- Electricity & Lumbering Specialists
- Secondary Specialized Roles: Crude Oil, Medicine & Ranch Grazers
- Automated Mining Camp vs. Production Workshop Base Split
- Optimal 20-Worker Base Blueprint
- Frequently Asked Questions (FAQ)
- Sources
- Palworld tools
The S-Tier base workers in Palworld are Astegon (Mining 4, Nocturnal 24/7), Anubis (Handiwork 4, Mining 3, compact hitbox), Jormuntide (Watering 4), Lyleen (Planting 4), and Helzephyr (Transporting 3, flying hitbox). Avoid oversized ground haulers like Wumpo (Transport 4), which constantly clip through base geometry and starve on second-floor roofs. Use our interactive Work Suitability Finder to filter by skill level and compare real task priorities.
Version boundary: Verified for Palworld Sakurajima Update (v0.3.x+). Breeding algorithms, work suitability scaling, SAN depletion formulas, and dedicated server INI parameters reflect current stable game code.
Work Suitability Scaling & Task Prioritization
Building an efficient base in Palworld requires understanding how work suitability tiers scale. Work speed does not increase linearly; each level increase provides roughly a 3x exponential speed multiplier over the previous tier. A Pal with Mining Level 4 mines ore nodes approximately 27 times faster than a Mining Level 1 worker.
However, high suitability ratings are useless if a Pal gets stuck on terrain, consumes excessive food, or constantly abandons primary tasks for lower-priority secondary jobs. For example, Pals with both Handiwork and Transporting will frequently run across the base to pick up a single stone instead of finishing an ongoing sphere crafting queue. The tier lists below evaluate workers based on four criteria: Suitability Tier, Nocturnal Stamina, Hitbox NavMesh Clearance, and Task Purity.
Mining & Handiwork Tier List
Mining generates Ore, Coal, Sulfur, and Stone—the core raw materials of every technological era. Handiwork determines how quickly weapons, ammo, spheres, and building structures assemble.

| Pal & Dexterity # | Primary Skills | SAN & Hunger | Tier | Strengths & Operational Verdict |
|---|---|---|---|---|
| Astegon (#98) | Mining 4 · Handiwork 1 | Hunger 9 · High SAN | S+ (Best Miner) | Nocturnal (Dark/Dragon). Never sleeps at night, mining 24/7. Massive ore damage per strike. Keep near high-quality hot springs. |
| Blazamut (#96) | Mining 4 · Kindling 3 | Hunger 9 · Normal SAN | S (Burst Miner) | Fastest raw node clearing during daytime. Secondary Kindling 3 can occasionally pull it away from mining to smelt ingots. |
| Anubis (#100) | Handiwork 4 · Mining 3 · Transport 2 | Hunger 6 · Low SAN drain | S+ (Best Crafter) | Highest baseline crafting speed in game code. Compact humanoid collision mesh prevents pathing lockups. Drops mining instantly whenever a craft queue opens. |
| Digtoise (#19) | Mining 3 | Hunger 5 · Low SAN drain | B (The Automated Trap) | While Digtoise's Drill skill deals massive damage when in player party with its headband, its automated base AI deals only 1 damage per hit on static nodes without player presence. |
The Monitoring Stand: Custom Task Prioritization
Introduced in the major Sakurajima (v0.3.x) update, the Monitoring Stand fundamentally solves task distraction. When built (Technology Level 15), players can open an interactive management matrix for every single worker assigned to the base:
- Disabling Secondary Tasks: For Anubis, uncheck the Transporting box. This ensures Anubis stays dedicated exclusively to Handiwork crafting orders and Stone/Ore pits, never running off to pick up loose wood chips.
- Locking Agricultural Roles: For Lyleen, uncheck Handiwork and Medicine Production so she remains 100% focused on seeding Wheat and Berry plots.
- Adjusting Work Stance: Choose between "Normal", "Heavy Work", and "Hardcore Work". Keep workers on Normal or Heavy Work while serving Salad to maximize speed without risking depression.
Farming Triad: Planting, Watering & Gathering Ratios
Automating Wheat, Berries, Lettuce, and Tomatoes requires tight synchronization between Planting, Watering, and Gathering workers. A delay in any of the three steps halts the entire agricultural cycle.

- Planting Specialists: Lyleen (#104) is the premier S-Tier crop planter with Planting Level 4 and Gathering Level 2. Lyleen seeds plots in under 3 seconds. For mid-game bases, Petallia (#87) provides Planting Level 3 with a smaller body footprint.
- Watering Specialists: Jormuntide (#101) features Watering Level 4, hydrating an entire 4-plot crop array in a single continuous breath. Warning: Jormuntide has an enormous serpentine collision mesh. If your base has indoor roofs lower than 3 wall units, use Azurobe (#82, Watering 3) instead, as Azurobe glides smoothly through standard 1-wall doorways without pathing desyncs.
- Gathering & Handiwork All-Rounders: Verdash (#77) is the most reliable agricultural support Pal in the game. Featuring Gathering 3, Planting 2, Handiwork 3, Lumbering 2, and Transporting 2, Verdash harvests ripe crops instantly and hauls them to adjacent feed troughs with zero pathing errors.
Transporting Physics & Hitbox Collision Analysis
Transporting is the most bug-prone suitability in Palworld. Ground-based haulers calculate complex NavMesh pathing around every fence, chest, and crop plot. Large haulers frequently get trapped on staircases or second-story balconies, triggering starvation and depression while the player is away.

| Hauler Pal | Transport Level | Locomotion Type | Tier | Hitbox & NavMesh Analysis |
|---|---|---|---|---|
| Helzephyr (#97) | Level 3 | Flying (Dark) | S+ (Best Overall Hauler) | Glides horizontally over walls, fences, and crops. Immune to staircase pathing loops. Nocturnal: Cleans up the entire base while diurnal Pals sleep. |
| Anubis (#100) | Level 2 | Fast Ground Sprint | A+ (Best Heavy Hauler) | Rapid base sprint speed. Quickly clears high-density ore and stone piles directly adjacent to pits. |
| Gorirat (#49) | Level 3 | Medium Ground Walk | A (Solid Indoor Hauler) | Compact humanoid hitbox fits through standard single doors. Excellent for multi-room interior workshop layouts. |
| Wumpo (#91) | Level 4 | Giant Ground Walk | B (Severe Collision Risk) | Highest single-trip carry capacity, but its massive sphere collider frequently wedges inside roof rafters and perimeter cliffs, leading to starvation. |
Base NavMesh Architecture & Structural Clearance
Even S-Tier Pals fail if base building structures obstruct pathing algorithms. Follow these spatial guidelines:
- Double-Width Staircases: Always build staircases at least 2 tiles wide (2 adjacent stairs side-by-side) with no railing walls on corner landings. Single-width stairs cause large Pals to slip off edges and enter infinite falling loops.
- The 3-Wall Ceiling Rule: Any multi-floor building housing Pals larger than a human (such as Astegon, Jormuntide, or Relaxaurus) requires ceilings at least 3 full wall units high. Building 2-wall ceilings causes large Pals' heads to clip into upper floors, locking their movement.
- Hub-and-Spoke Layout: Place the Palbox in the center of your camp circle. Position the Feed Basket within 5 meters of the Palbox, with sleeping beds lined along outer walls. This minimizes transit distances for eating and sleeping.
The Nocturnal Advantage: 24/7 Base Productivity
In Palworld, daytime lasts 20 minutes and nighttime lasts 10 minutes. Standard diurnal Pals sleep through the entire night cycle, spending 33.3% of total server clock time idle in bed. In contrast, Dark-type Pals are nocturnal and never sleep, delivering a flat +50% daily resource yield boost over diurnal equivalents.

To sustain nocturnal workers without SAN breakdown:
- Build High Quality Hot Springs: Place at least two High Quality Hot Springs (Technology Level 23) in central base walkways. Nocturnal Pals soak for 15 seconds between shifts to fully restore SAN.
- Feed Salad or Pizza: Never feed raw berries to nocturnal workers. Salad (+30% Work Speed, +11 SAN) and Pizza (+30% Work Speed, +23 SAN) maintain worker SAN at 100% permanently without requiring bed rest.
Electricity & Lumbering Specialists
In addition to mining and farming, advanced late-game bases require steady power grids and timber reserves to fuel sphere assembly lines and charcoal smelters.
- Electricity Specialists: Orserk (#106) provides native Generating Electricity Level 4 and Handiwork 2. A single Orserk charges Power Generators in seconds, easily sustaining high-draw Electric Kitchens and Weapon Assembly Lines. For mid-game bases, Grizzbolt (#103, Electricity 3) or Rayhound (#60, Electricity 2) provide consistent power without the high food upkeep of Orserk.
- Lumbering Specialists: Bushi (#48) and Verdash (#77) provide Lumbering Level 3. Unlike oversized Pals that struggle around Logging Sites, Bushi navigates directly to the center stump, chops wood with rapid katana animations, and immediately switches to transporting or kindling when logging quotas are filled.
Secondary Specialized Roles: Crude Oil, Medicine & Ranch Grazers
Beyond the core trinity of Mining, Farming, and Crafting, endgame automated camps require high-efficiency specialists for specialized resources introduced in recent expansions:
| Specialized Facility | Key Resource Produced | S-Tier Specialist Pal | Key Operational Advantage |
|---|---|---|---|
| Crude Oil Extractor | Crude Oil | Orserk (#106) / Relaxaurus Lux | Generating Electricity Level 4 powers continuous extraction pumps without stalling. |
| Medieval / Electric Medicine Table | High Grade Medical Supplies | Lyleen Noct (#104B) | Medicine Level 3 + Nocturnal (Dark). Produces ulcer and depression cures overnight while daytime staff rests. |
| Ranch (High Quality Cloth) | High Quality Cloth (84 Gold each) | Sibelyx (#79) | Fastest grazing rate for high-value textiles. Two 4-star Sibelyx generate over 30,000 gold per hour passively. |
| Ranch (Gold Coins) | Direct Gold Currency | Mau (#24) / Mau Cryst | Drops bags of 10-25 gold coins directly onto the ground. Ideal for starter bases before merchants are reached. |
Automated Mining Camp vs. Production Workshop Base Split
As your guild progresses into the endgame, attempting to combine breeding ranches, large-scale agriculture, and heavy mining inside a single Palbox camp leads to pathfinding gridlock and worker idle locks. Dedicated players operate a specialized Two-Base Architecture:
| Camp Role | Primary Facilities | Recommended Staff | Key Efficiency Strategy |
|---|---|---|---|
| Base 1: Heavy Extraction & Smelting | Ore Pit II, Stone Pit, Charcoal Kilns, Electric Smelter | 6 Astegon (Mining 4), 4 Anubis, 2 Jormuntide Ignis (Kindling 4) | Pure extraction focus. Zero ranches or breed pens to maximize single-purpose mining throughput. |
| Base 2: Breeding & Culinary Workshop | 3 Breeding Farms, 2 Ranches, Electric Kitchen, Refrigerator | 4 Mozzarina, 4 Beegarde, 2 Chikipi, 2 Lyleen, 1 Jormuntide, 1 Jormuntide Ignis | Dedicated to continuous Cake production and 24/7 egg generation without heavy mining dust lag. |
Splitting your camps eliminates collision friction between giant miners (like Astegon) and delicate ranch grazers (like Beegarde). By utilizing the Palbox fast travel anchor, you can transport 2,000 raw Ore to your main crafting workshop in under 10 seconds.
Optimal 20-Worker Base Blueprint
On servers configured for 20 base workers (see our Dedicated Server Settings Guide), deploy this balanced staff roster: 4x Astegon (Mining), 4x Anubis (Handiwork & Stone), 2x Lyleen (Planting), 2x Jormuntide (Watering & Mill), 3x Helzephyr (Transporting), 2x Mozzarina (Ranch Milk), 2x Beegarde (Ranch Honey), and 1x Jormuntide Ignis (Smelting & Cake).
Frequently Asked Questions (FAQ)
Why does Digtoise deal so little damage to Ore nodes when left in base?
Digtoise's primary mining damage comes from its partner skill (Drill Crusher), which activates only when summoned from the player's active party with its headband crafted. When assigned as an autonomous base worker, its spinning shell hits for only 1 damage per tick due to automated AI throttling, making Astegon or Anubis significantly faster miners.
How do I cure Pals that get Depression, Fractures, or Overfull?
Craft a Medieval Medicine Workbench (Technology Level 12) or Electric Medicine Workbench (Technology Level 43). Feed Medical Supplies for Sprains and Fractures, and High Grade Medical Supplies for Ulcers and Depression. Prevent recurrences by replacing raw Berries with Cooked Berries or Salad in feed troughs.
Can flying Pals haul items faster than ground Pals?
Yes. Flying haulers like Helzephyr ignore all ground collision meshes, fences, and staircases, pathing in a straight horizontal vector between dropped items and storage boxes. This completely prevents pathing stalls.
What is the best way to keep Jormuntide from getting stuck on roofs?
Build all crop plots, mills, and water stations outdoors with zero ceilings above them. Alternatively, substitute Jormuntide with Azurobe (#82), which has Watering Level 3 and a much smaller serpentine body that navigates interior doorways smoothly.
Does increasing base worker count beyond 15 cause lag?
On local single-player worlds, running 20 workers has minimal performance impact on modern PCs. On dedicated multi-player servers, cap workers at 20 per base to prevent physics NavMesh tick latency from degrading server performance.
Sources
Work speed multipliers and NavMesh collision dimensions verified on Palworld v0.3.x game code. Search every Pal’s suitability profile instantly in our Pal Work Suitability Finder.