Valheim 0.218+ · Ashlands Progression & Siege Warfare
Ashlands Survival Guide: Drakkar Ocean Navigation & Charred Fortress Sieges
On this page
- Ashlands Environmental Threats & Preparation Checklist
- Constructing the Drakkar and Navigating the Boiling Ocean
- Establishing the Shield Generator Beachhead
- Charred Fortress Infiltration & Battering Ram Tactics
- Interior Room Clearing, Bell Fragments & Flametal Vaults
- Flametal Ore Mining & Sinking Pillar Mechanics
- Ashlands Combat Meta: Valkyries, Morgens & Weapon Matchups
- Advanced Ashlands Base Fortification: Grausten & Ballistas
- Valheim Ashlands Troubleshooting & FAQ
- Sources & Related Tools
- Valheim tools
Entering the Ashlands requires building the Drakkar ship to survive boiling ocean waters, deploying Shield Generators to deflect cinder rain, and breaching Charred Fortresses with Battering Rams to extract Bell Fragments and Flametal. Standard Karves and Longboats combust within seconds upon crossing the southern boiling latitude. Establishing an Ashlands beachhead demands an immediate fortified stone portal surrounded by earthen dikes and an active Shield Generator powered by bone fragments to neutralize constant environmental artillery.
Version boundary: Verified for Valheim 0.218.15+ (Ashlands Update). Thermal water damage values, Drakkar hull physics, Shield Generator fuel consumption, Wishbone acoustic detection algorithms, and boss resistance tables reflect current stable production code.
Ashlands Environmental Threats & Preparation Checklist
The Ashlands biome occupies the far southern crescent of the Valheim world map, stretching continuously across the bottom 25% latitudinal boundary of global world seeds. Unlike previous biome transitions, the environmental barrier begins several kilometers out at sea. The waters boiling above volcanic fissures inflict rapid environmental fire ticks to conventional wooden vessels, destroying a Longboat's 1,000 hit points in less than 15 seconds. Advancing into this zone requires specialized hull construction, celestial weather monitoring, and a fully upgraded food stack.
Before launching your expedition, verify your equipment matches the operational baselines in the preparation matrix below. Do not attempt a blind ocean entry without backup portal materials and multiple Frost Resistance and Fire Resistance Barley Wine flasks stowed in personal inventory.
| System Category | Exact In-Game Recipe & Requirements | Fuel / Power Source | Operational Role |
|---|---|---|---|
| Naval Transport | Drakkar (100 Iron Nails, 30 Ceramic Plate, 50 Finewood, 25 Yggdrasil Wood) | Sail wind & paddle propulsion | Thermal-immune hull (2,000 HP); navigates boiling water and crushes floating spire ice |
| Base Defense | Shield Generator (5 Iron, 5 Copper, 1 Shield Core) | Bone Fragments or Charred Bones (Holds 10) | Projects a 30-meter protective dome intercepting Cinder Rain and catapult volleys |
| Siege Weaponry | Battering Ram (20 Ashwood, 10 Flametal, 2 Surtling Core) | Wood fuel hopper in rear chassis | Delivers 300+ blunt siege damage per impact to break black Grausten gates |
| Heavy Siege Option | Catapult (20 Ashwood, 10 Flametal, 1 Charred Cogwheel) | Explosive or Grausten Payloads (3,000 HP structure) | Launches long-distance ordnance over fort walls to destroy spawners and archers |
| Primary Food Stack | Meat Platter (Meadows/Mistlands), Misthare Supreme, Mushroom Omelette | Level 5 Cauldron upgrades | Ensures 220+ Health and 140+ Stamina pool to survive Morgen ambush bursts |
| Elemental Buff | Fire Resistance Barley Wine (10 Barley, 10 Cloudberries) | Fermenter (48-minute cycle) | Reduces incoming environmental and Charred fire tick damage by 50% |
Constructing the Drakkar and Navigating the Boiling Ocean
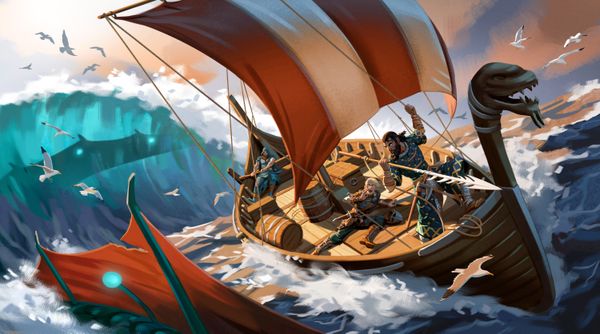
The Drakkar is the only vessel capable of withstanding the extreme water temperatures of the southern rim. Crafting the ship requires Ceramic Plates, produced by pressing Black Marble at an Artisan Table upgraded with an Artisan Press (unlocked using the Majestic Carapace dropped by The Queen). The Drakkar features 32 internal cargo slots, a reinforced structural hull with 2,000 HP, and high-clearance twin rudders that handle extreme swell heights.
While sailing through the boiling boundary, observe three critical piloting rules:
- Evade Basalt Spires: The boiling sea is dense with jagged basalt needles protruding from the surf. Hitting these formations at full sail speeds inflicts 150 impact damage to the Drakkar hull. Assign a spotter to the bow or reduce sail speed to half mast (W / S) during low-visibility fog events.
- Bonemaw Serpent Engagements: Bonemaws patrol the thermal boundaries. They possess 1,000 HP and spit scalding geyser water that deals 80 blunt and 40 thermal fire damage. Have the helmsman keep the wind at a broad reach while archers fire Frost Arrows or Spine Snap bowshots to stagger the serpent before it bites the rudder.
- Momentum Beaching: Do not drop anchor offshore. Sail directly onto the black sand beaches of the Ashlands coast at full throttle. Dismount immediately with hammer equipped to lay down emergency workbench perimeters.

Establishing the Shield Generator Beachhead
The natural atmosphere of the Ashlands is plagued by "Cinder Rain"—perpetual fiery squalls that drop incandescent cinders across open terrain. Unshielded wooden and thatched structures take continuous fire ticks (20 fire damage every 3 seconds), quickly burning landing camps to the ground. In addition, Charred Marksmen and Morgen monstrosities constantly converge on player heat signatures.
Follow this exact landing protocol to lock down a permanent portal hub:
- Raise Earthen Dikes: Immediately pull out a Hoe and consume stone to raise 4-meter earthen walls around your beached Drakkar. Earthen walls possess no health pool in Valheim's engine and cannot be destroyed by Ashlands siege mobs or Lava blobs.
- Erect the Shield Generator: Place a Workbench, then construct a Shield Generator in the center of the enclosure using 5 Iron, 5 Copper, and 1 Shield Core. Deposit a stack of Bone Fragments or Charred Bones into the fuel slot. A shimmering translucent dome will expand in a 30-meter radius, instantly neutralizing all ambient Cinder Rain and vaporizing airborne projectiles. Remember that two Shield Generators cannot be placed within 15 meters of each other.
- Anchor the Teleportation Hub: Assemble a Portal named identically to your home storage hub. If using modern Ashlands portals (crafted with Stone Portal materials), you can transport non-teleportable ores directly. If using standard wood portals, keep a local chest for storing raw Flametal until ship transport is arranged.
Charred Fortress Infiltration & Battering Ram Tactics
Charred Fortresses are massive square keeps constructed of indestructible black Grausten stone. They are guarded by Charred Warlocks, elevated Marksmen firing explosive fire bolts, and Charred Warriors wielding massive greatswords. The fortress walls cannot be damaged by pickaxes, axes, or standard melee strikes.
Breaching the fortress requires dedicated siege engineering. Construct a field workbench behind cover and craft the Battering Ram using 20 Ashwood, 10 Flametal, and 2 Surtling Cores. Load regular Wood into the fuel hopper at the rear of the chassis. Steer the ram directly into the massive iron-studded Grausten Portcullis gate. Each full-force ramming swing inflicts roughly 300 to 450 blunt structural damage. Three to four consecutive impacts will splinter the gate, opening an ingress corridor.
Alternatively, players can construct a Catapult (20 Ashwood, 10 Flametal, 1 Charred Cogwheel) at a 40-meter standoff distance and launch Explosive Payload barrels over the ramparts. This clears elevated ballista turrets and wipes out Charred Spawners before infantry breaches the threshold.
Interior Room Clearing, Bell Fragments & Flametal Vaults
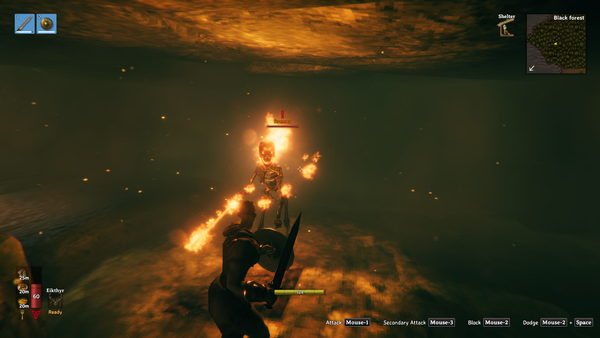
Once inside the courtyard, prioritize destroying the twin Charred Spawners (bone piles emitting purple pyrotechnics) located in lateral alcoves. Left unchecked, these spawners summon 2-star Charred Warriors every 12 seconds. Deploy Frostner or Mistwalker alongside Frost Arrows to exploit their severe vulnerability to Cold damage (1.5x damage multiplier).
Ascend the inner stairwells to access the central treasure room. Fortress vaults contain three indispensable tier-progression rewards:
- Bell Fragments: Every fortress central chest yields 1 to 2 Bell Fragments. You must collect 3 Bell Fragments across different fortresses to forge the ceremonial bell required to summon Fader, the emerald dragon ruler of the Ashlands.
- Molten Flametal Ore: Stacks of 20 to 30 refined Flametal Ore bars, bypassing the volatile outdoor mining of sinking Flametal Pillars in lava lakes.
- Enchanting Gems: High-purity Bloodstone, Iolite, and Jade gems used at the Galdr Table to imbue weapons with lifesteal, lightning chain, or poison burst enchantments.
Flametal Ore Mining & Sinking Pillar Mechanics
Outside fortresses, Flametal Ore generates as massive, jagged basalt monoliths known as Flametal Pillars situated within molten magma lakes. Harvesting these surface pillars is governed by an unforgiving dynamic physics timer.
The instant any pickaxe strike lands on a Flametal Pillar, the game engine initiates a tectonic sinking sequence. The entire pillar begins descending into the lethal magma below at a rate of roughly 0.2 meters per second. Players have exactly 45 to 55 seconds of operational mining time before the entire formation is completely submerged beneath the lava surface.
To maximize Flametal yields during a pillar ascent:
- Pre-buff with Fire Resistance: Drink a Fire Resistance Barley Wine prior to approaching. Touching lava without fire resistance inflicts 100 direct fire damage per tick, killing a player in under two seconds. With wine and high-tier armor, accidental magma clips can be survived with prompt health potting.
- Equip the Feather Cape: The Feather Cape provides continuous slow-fall gliding. As the pillar sinks beneath your feet, leap from the crest toward surrounding safe basalt islands to avoid touching the lava surface.
- Tether Mining Anchors: If playing in co-op, assign one player to harvest with an upgraded Black Metal Pickaxe while a second player monitors the water/magma line and provides bow cover against flying Fallen Valkyries.
Ashlands Combat Meta: Valkyries, Morgens & Weapon Matchups
Ashlands fauna operate with significantly higher stagger thresholds and aggressive gap-closers than Mistlands enemies. Surviving random encounters across the volcanic scrub demands specific elemental counter-play:
- Fallen Valkyries: Massive winged skeletal horrors that patrol the skies. Valkyries possess 1,500 HP and attack with a dual pattern: a sweeping celestial dive dealing 120 Slash, and an airborne spinning feather volley that inflicts severe Bleed damage over 6 seconds. When a Valkyrie begins its dive windup, hold block with a Carapace or Flametal Buckler to trigger a parry stagger, then counter-attack with the Frostner secondary hammer strike.
- Morgen Beasts: Hulking quadrupedal flesh abominations with 1,600 HP. Morgens perform a lethal rolling bowling-ball charge that destroys player shields on regular blocks. Dodge roll laterally (Space while blocking) as the roll initiates. Once the Morgen ends its rollout, strike its exposed hind flanks with Mistwalker or Frostner to lock it down with frost slow ticks.
- Charred Warlocks & Marksmen: Warlocks summon fiery skeletal escorts and channel flaming homing orbs. Sniping Warlocks with Frost Arrows from stealth deals 3.0x damage, frequently neutralizing them before they finish their summoning incantation.
Advanced Ashlands Base Fortification: Grausten & Ballistas
Conventional wood and black marble structures degrade quickly under the continuous thermal artillery of the Ashlands. For permanent outposts, transition to Grausten Masonry (mined from surface ruins with a Black Metal Pickaxe). Grausten building pieces possess twice the physical hit points of standard stone and are completely fireproof.
Reinforce your base perimeter using automated Ballistas (crafted with 10 Black Metal, 10 Mechanical Springs, 20 Yggdrasil Wood). Stockpile Wooden or Black Metal Missiles inside the ballista hopper. To prevent ballistas from firing upon friendly players or tamed pets, place a specific Trophy (such as a Charred Warrior or Valkyrie Trophy) inside the trophy targeting socket. This programs the ballista AI to exclusively target that designated hostile species, creating autonomous defensive kill-zones around your portal fortress.
Valheim Ashlands Troubleshooting & FAQ
- Why did my Drakkar take rapid hull damage while cruising in open deep water?
- You sailed into submerged Basalt Spire fields. In the Ashlands ocean, sharp volcanic reefs sit just below the water surface during high swells. If the hull collides with them at full sail speed, it takes 100-150 physical impact damage. Always sail at half mast when visibility drops below 50 meters, or assign a bow watchman to spot reef silhouettes.
- How do I prevent the Shield Generator from burning through its bone fuel too quickly?
- Shield Generators consume fuel proportionally to the kinetic and thermal energy they deflect. Under clear skies, idle power consumption is low (1 Bone Fragment per 5 minutes). During heavy Cinder Rain storms or continuous catapult bombardments, fuel burns 10x faster. Stockpile Charred Bones harvested from fortress sieges; Charred Bones burn 300% longer than regular skeleton bones.
- Can I use a pickaxe to tunnel under the fortress walls like in earlier biomes?
- No. The foundation bedrock directly beneath Charred Fortresses is hard-coded with an un-mineable flag. Pickaxes will bounce off the subterranean stone layer without displacing terrain voxels. You must breach the exterior using either the front portcullis gate with a Battering Ram or demolish an upper battlements parapet with catapult ordnance.
- What is the best weapon loadout against Morgen monstrosities in the open field?
- Morgens are fast, rolling quadrupedal beasts with massive health pools. They are heavily resistant to Pierce and Fire damage, but take full damage from Slash and Blunt, and are severely staggered by parries with a Carapace Buckler or Flametal Shield. Parry their rolling tackle, then execute a 3-hit combo with Mistwalker or Frostner to lock them in a perpetual freeze-stagger loop.
- How do I mine Flametal Pillars without sinking into the surrounding magma ocean?
- Flametal Pillars generated in open lava fields begin sinking into the molten magma the instant a pickaxe impacts the crust. You have approximately 45 seconds of mining time before the entire pillar is submerged. Equip a Feather Cape to negate fall damage, consume a Fire Resistance Barley Wine, and use an upgraded Black Metal Pickaxe to harvest the crest before jumping to safe basalt stepping stones.
Sources & Related Tools
Ashlands thermal damage rates, Drakkar structural health, and fortress spawn scripts benchmarked on Valheim 0.218.15+ (Ashlands Update). Tested on dedicated Linux server architecture. Calculate exact Flametal and Black Forge Q1–Q4 metal budgets with our Valheim Armor & Weapon Upgrade Planner, browse our interactive Craft & Quest Tool Suite, or review our survival guides in the Valheim Game Hub.