Chained Beasts · Arena field guide
Chained Beasts Trainer: Shared XP & Overtraining
On this page
At the Trainer, everyone contributes reps to one XP bar, while pain and injuries belong to individual players. Take turns, check each player’s pain, and stop before the next set costs more than the level is worth. In 1.0.2, Tutorial and Pleb introduce risky training from Germania; Carthage still gives a safe level-up.
Check the act and difficulty before lifting
Open the Trainer visit and read the level counter above the party. The long bar beside it is the next level’s shared progress. Then look down each character’s column: the injury card and personal pain markers tell you who is paying for the next set of reps.
Update 1.0.2 changed the early difficulties. On Tutorial and Pleb, Carthage training still awards a level without risk. From Germania onward, those difficulties use the full lifting system. If training suddenly starts demanding decisions after the first act, you have reached the intended transition.
| Where you are | What to expect | First check |
|---|---|---|
| Tutorial/Pleb in Carthage | A safe level-up | Choose a useful skill for the first act. |
| Tutorial/Pleb from Germania | Reps, pain and overtraining risk | Read each character’s condition before another set. |
| A risk-based Trainer visit | Party XP, personal injuries | Agree who lifts next instead of everyone pressing together. |
Check the game version with your group before comparing a session to an older guide. The first public 1.0.2 update also warned of a delayed Switch rollout and provided a Steam crossplaycompatibility branch. Follow the current announcement when playing across platforms; an older training rule can explain why two groups describe different early visits.
Fill the shared XP bar without injuring everyone
A training choice commits your character to a randomly determined set of one to three reps. Reps add XP to the common bar and pain to the lifter. Because the set length varies, leave room for more than one rep when deciding whether to continue.
Use the party bar to decide how much work remains, then use individual pain to decide who should do it. A fresh player can contribute while an injured teammate rests. When everyone trains simultaneously, several characters may take unnecessary pain while chasing the same remaining piece of the bar.
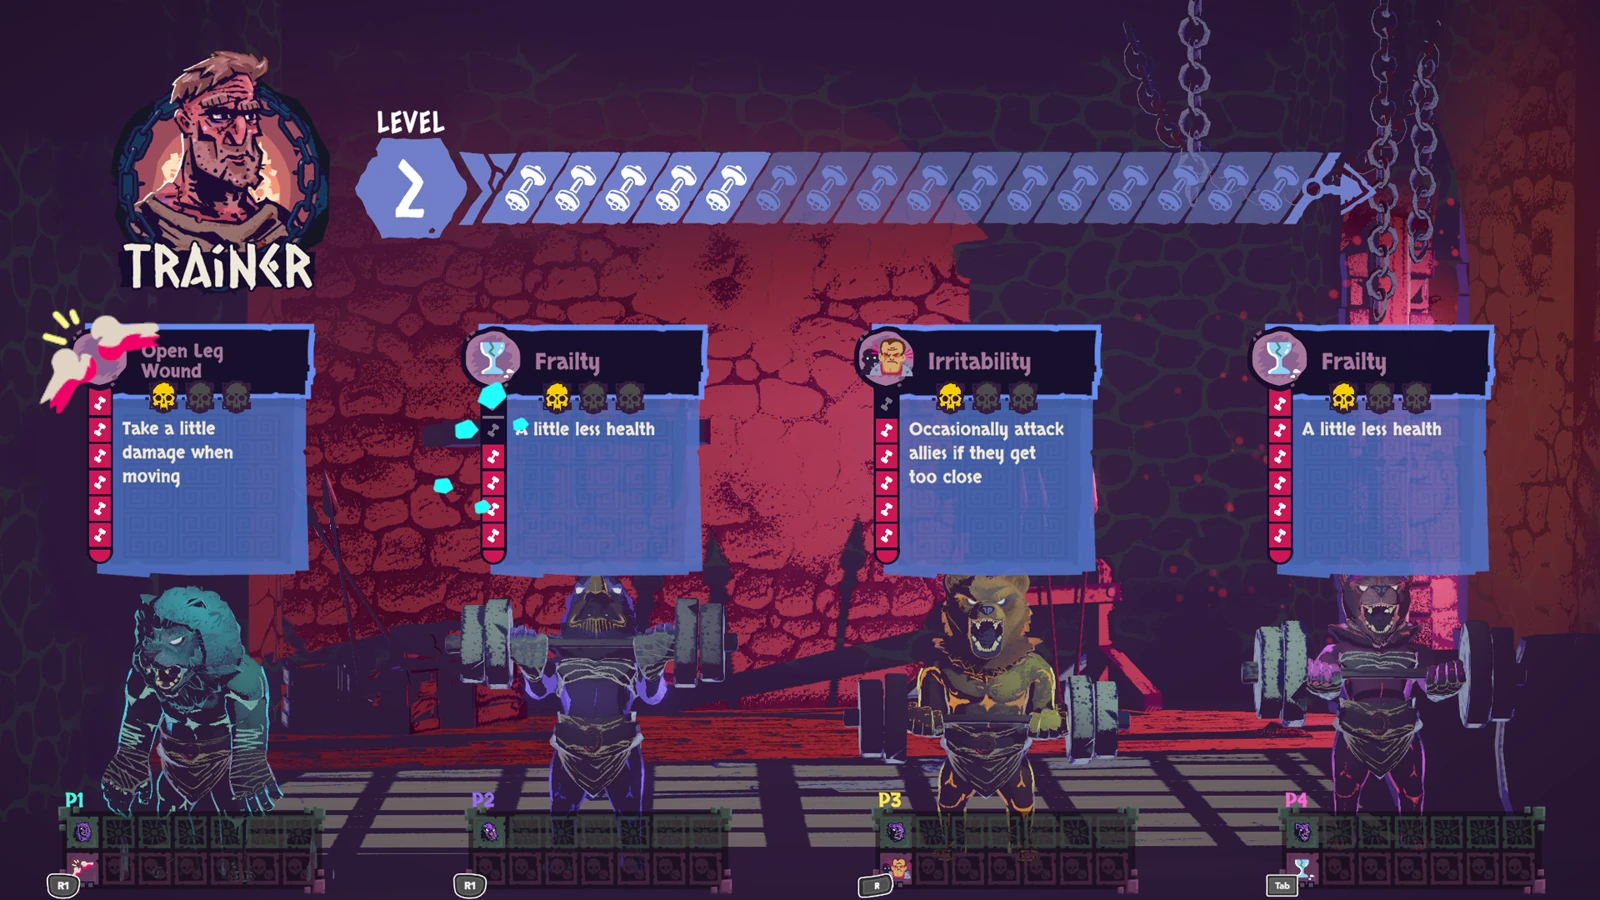
- Let one player take a set and wait for the bar to finish moving.
- Read the new XP position and that player’s pain.
- Ask a less strained teammate to handle the next set when possible.
- At a level-up, read the offered skills before committing to more lifting.
Near the end of the bar, call out who is finishing the level. The player with the most health is not automatically the best volunteer: a movement or throwing injury can damage the role they perform in the next arena. Include their existing afflictions in the decision.
In solo play, check the bar after each set because the same character carries every injury. Decide whether you can fight the next round with the condition currently being offered. A level gained just before losing reliable movement may make a difficult arena harder to survive.
Read the injury before accepting another set
The pain consequence matters after you leave the menu. A movement injury changes how you dodge, a shoulder injury affects throwing, and a lung injury can restrict stamina recovery. Read the actual card on your character before choosing another set; the skulls and effect text give you different information.
Compare the four columns in the screenshot below. The party shares its progress, yet the players carry different effects. One character can be struggling to throw while another risks dropping gear during a dodge. Assigning both players the same job in the next fight ignores the decisions made at camp.
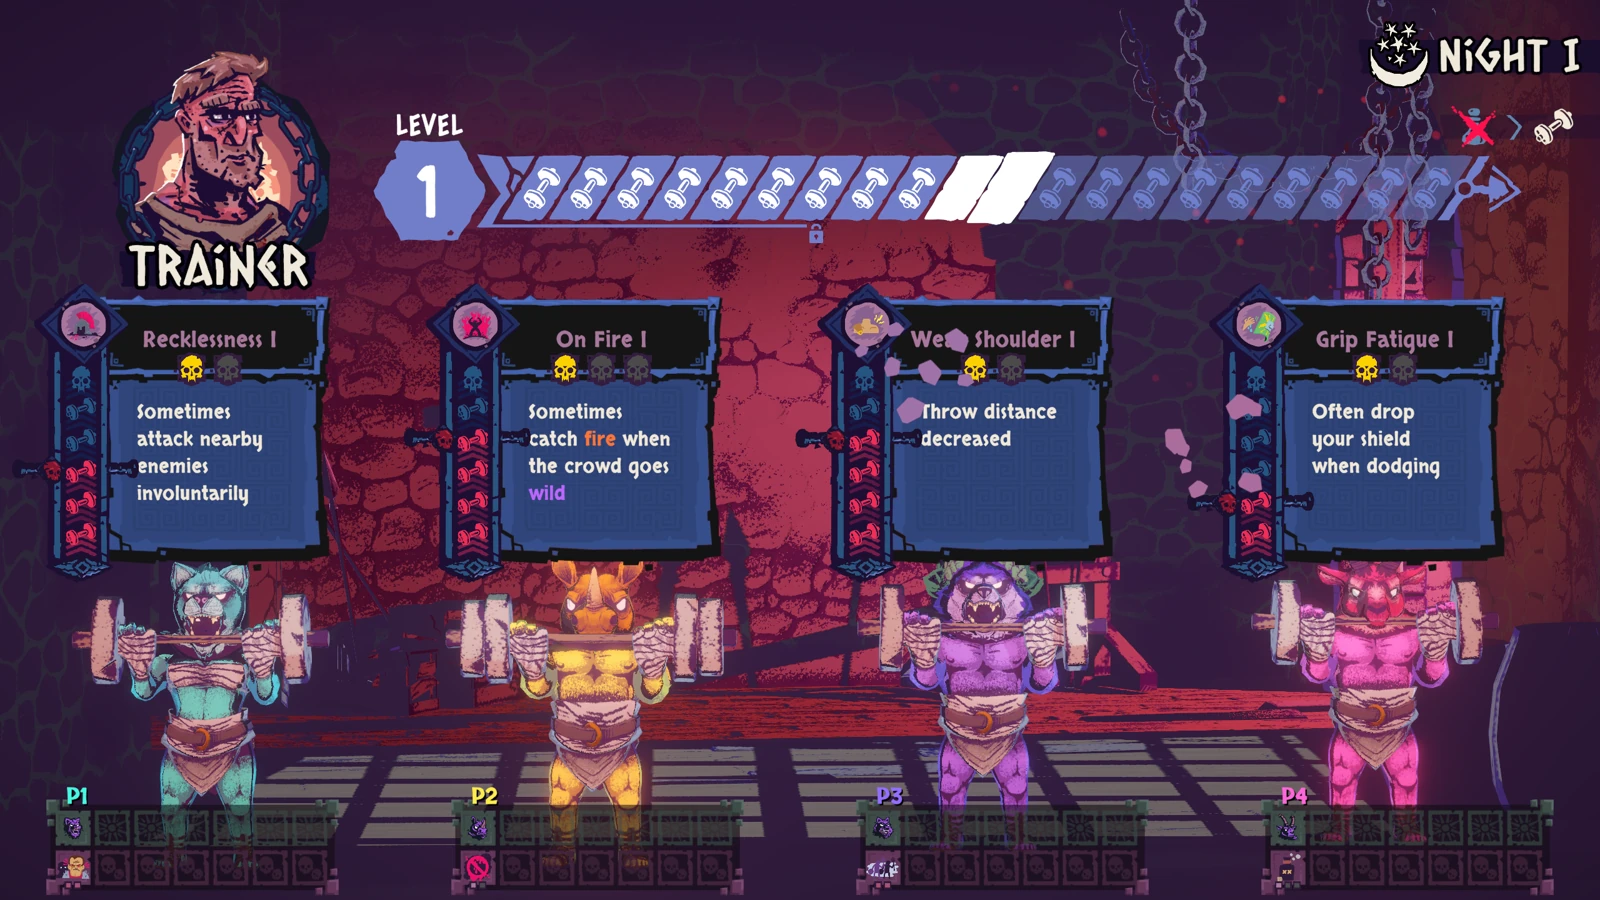
Protect the action your next fight needs. Before the Rhino’s charge and chain drag, keep enough movement control to leave its route. Before a throwing-heavy fight, avoid volunteering your best thrower for a set whose injury undermines that role.
If a teammate takes an injury to secure the next level, change the plan immediately. Give the injured player a nearby fighting position and let another person fetch distant equipment. Check the Healer’s choices at the next opportunity instead of assuming a potion will erase a training condition.
Choose the skill for the next arena
When the skill screen appears, read the trigger as well as the reward. A bonus tied to the crowd going wild asks you to maintain that condition; a backstab bonus asks you to get behind targets. Choose a trigger your current movement, weapons and afflictions let you use.
The On a Roll screen below rewards a kill while the crowd is going wild with a brief period of invulnerability. Check the wording on your own offered skill, then decide which player can produce its trigger during the next fight.
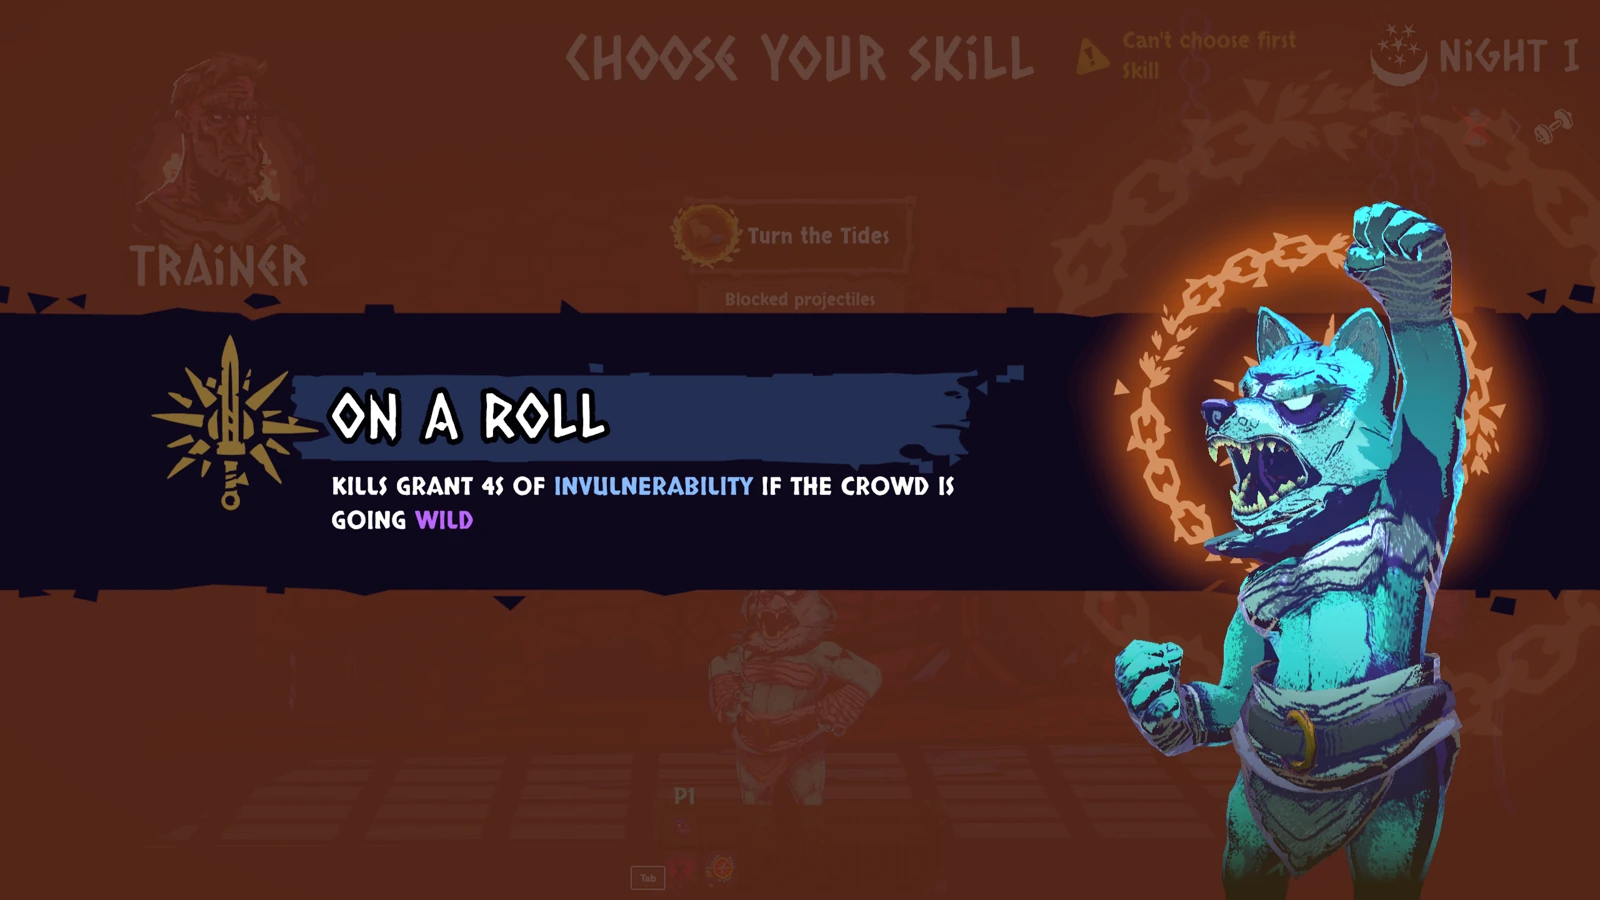
For a chained group, agree on the position that supports the new skill. A player trying to reach an enemy’s back needs room to circle; their partner can hold a stable position instead of pulling in the opposite direction. The Squeeze Attack walkthrough uses the same anchor-and-runner coordination for a different result.
Before leaving camp, each player should identify one action they will use in the next battle. That turns the skill choice into a usable plan: a specific target, a clear direction around it and a teammate who knows to leave the route open.
No Rest Day, Overtrained and a stopped XP bar
The Trainer achievements ask for different outcomes. No Rest Day requires training to exhaustion. Overtrained requires winning a run after reaching Trainer level 20. Untrained requires winning without levelling at the Trainer. Pick the intended challenge before spending a run on an incompatible route.
| Problem | Check | Next action |
|---|---|---|
| A teammate gains an injury while everyone gains XP | Who took the reps | Rotate the lifter; keep monitoring the shared bar. |
| Risk appears on Pleb after Carthage | Act and 1.0.2 rules | Use the full training decisions from Germania. |
| You reach level 20 without the win achievement | The run’s final result | Keep the surviving build intact and finish the run. |
| The next set looks expensive | Remaining XP and each player’s pain | Choose a fresher lifter or leave with the current level. |
Level 20 is a run-planning target, so track the displayed level at every visit. If you are falling behind, evaluate the next set while you still have enough health and movement to recover from its cost. Keep the group’s survival ahead of a last-minute attempt to force several levels.
Sources
Trainer mechanics · Update 1.0.2 · Steam achievements · Official gameplay images.