Moon Sweepers · PC · 1.0.5
Moon Sweepers Moon Map: Waypoints and Teleports
On this page
Use the station console for the Moon Map, right-click for location actions, and choose discovered stations in the Teleport panel. M changes survey views, G scans your current sector, and N cycles lighting after buying Night Vision Goggles.
Open the station map or change the survey view
At a station, use the main console to open the Moon Map. The globe gives you cleaning colours, discovered locations and the marker lists beside it. Start by finding your present station, then rotate the globe toward the area you want to visit.
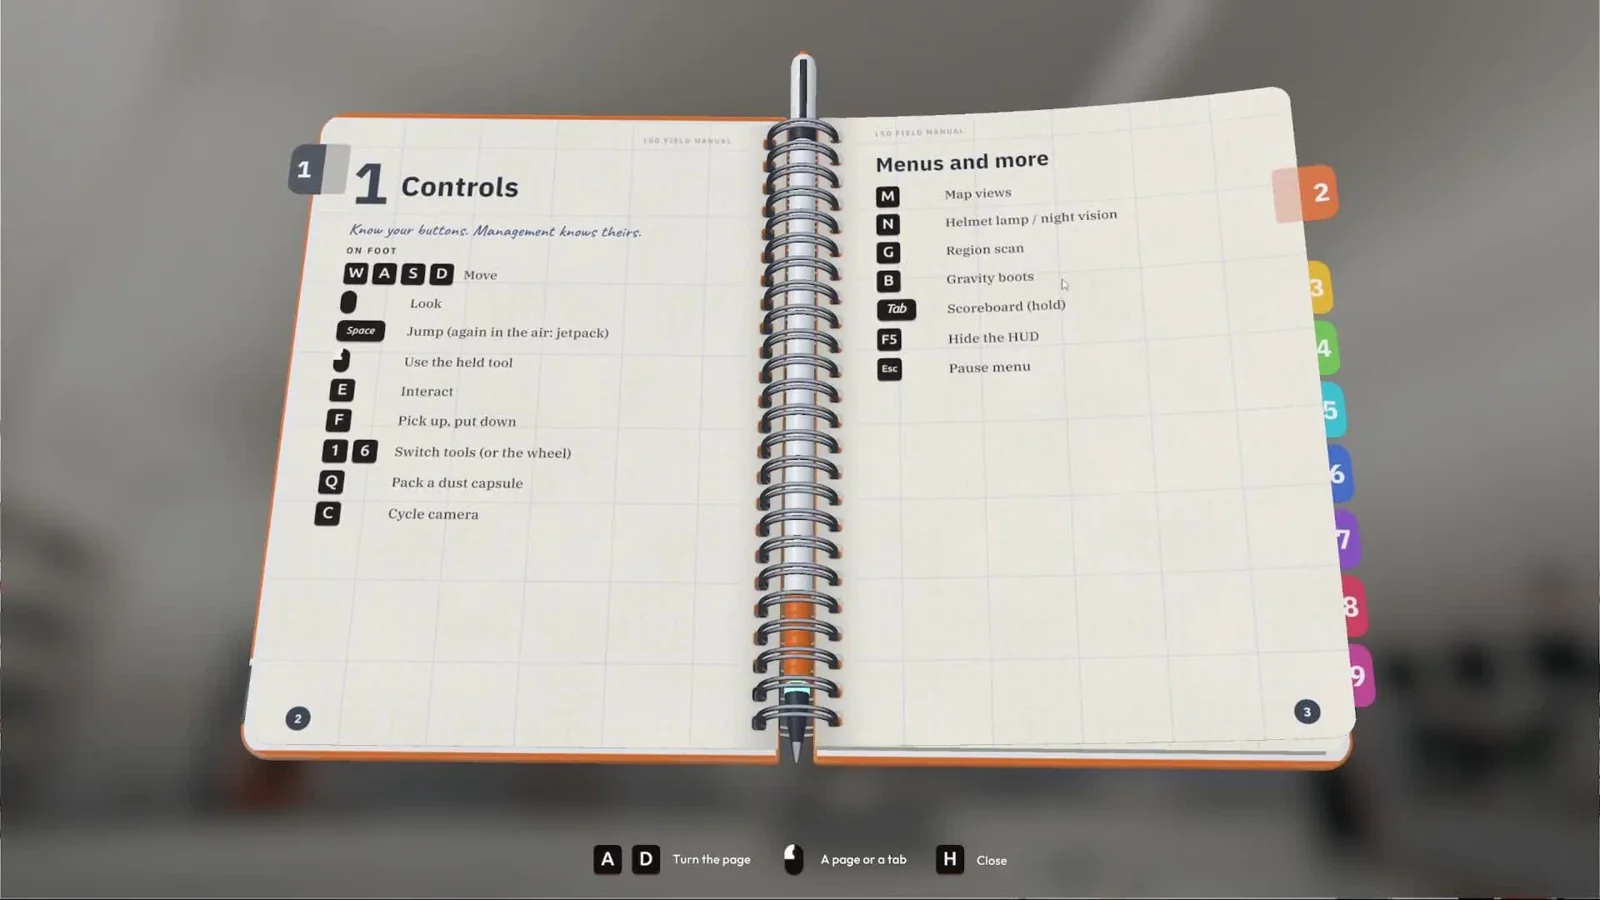
Out on the surface, M changes the map views: it lifts the camera into a survey view and then out to the whole Moon. Use that broader view to recover your bearings, then return to the surface before choosing the path around a crater or a factory.
The station interface has its own on-screen controls. In the illustrated PC view, dragging rotates the globe, the wheel zooms, F finds your position, and E or Esc leaves the console. Follow those prompts if you are looking at another part of the Moon and have lost track of the station you opened.
Use Find me before selecting the next destination when the globe has been rotated away from your position. Then zoom out just enough to see the station and the intended waypoint together.
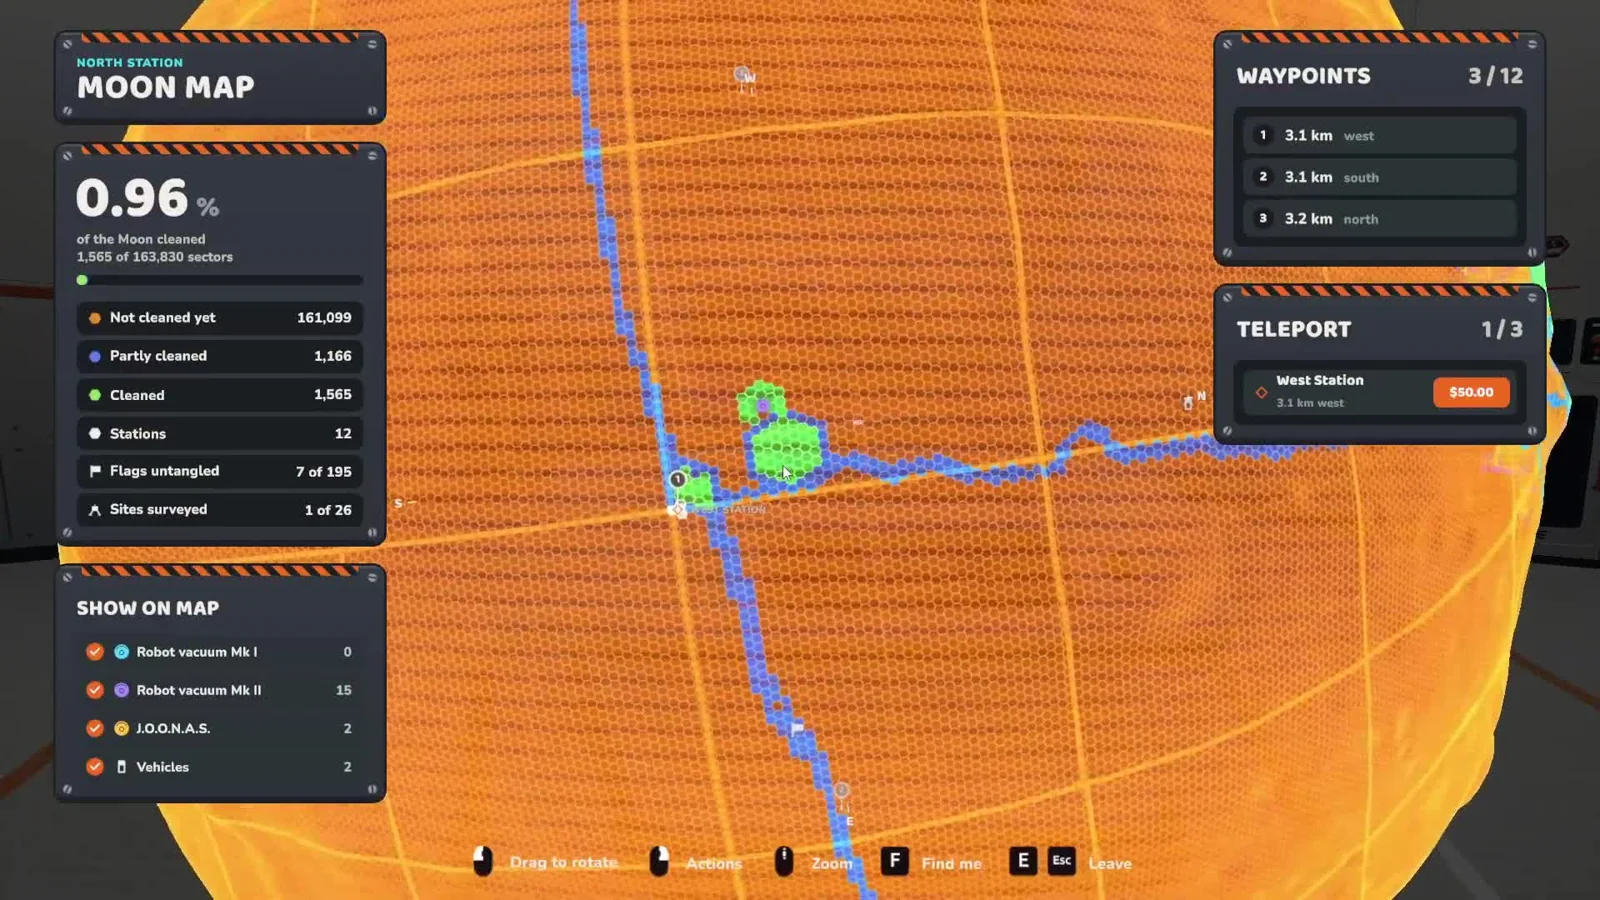
Read orange, blue and green before choosing a destination
The map shows orange for untouched ground, blue for partly cleaned ground and green for completed ground. Choose the colour that matches the job: orange for a fresh cleaning area, or a blue patch when you want to finish work already started.
Zoom in far enough to see individual hexes around a route. A thin blue trail through orange terrain can be a partially cleaned path; follow the coloured ground around your marked destination rather than treating the entire surrounding area as complete.
| Map colour | Meaning | What to do on arrival |
|---|---|---|
| Orange | Untouched ground | Check access and your return route before starting |
| Blue | Partly cleaned ground | Scan the sector and find the remaining dusty patch |
| Green | Completed ground | Use it as a landmark or a cleared approach to another area |
On foot, press G to scan the sector you are standing in. It reveals the sector edges and how clean it is. Stay inside that outline while looking for the last patch, especially when the next hex also has a partly cleaned surface.
If a cleaned sector remains at 99.9% far from players, or shows 0% despite having no dust, update before spending time sweeping an invisible remainder. The 1.0.5 patch fixes both kinds of stale completion report and checks affected finished sectors when the world loads.
Set a waypoint and keep a usable route back
Right-click on the Moon Map to open its actions for a location. Use the waypoint action to mark the destination, then check its entry and direction in the waypoint list. On leaving the map, look for the corresponding marker in your compass.
Place one marker for the work area and keep the return station easy to recognise. For a vehicle trip, decide which garage collector pad will receive the load before driving far beyond the base. Your cleaning route needs to end somewhere the hopper can empty.
- Find your current position on the station map.
- Zoom to an unfinished area with a practical route from the base.
- Right-click and set its waypoint.
- Read the direction and distance shown in the waypoint list.
- Return to the surface and check the marker against the terrain.
A compass bearing is useful for direction, while the surface view shows the slope and obstacles immediately ahead. If the direct line takes you over construction or a steep crater wall, work around that obstacle and keep the marker as your reference.
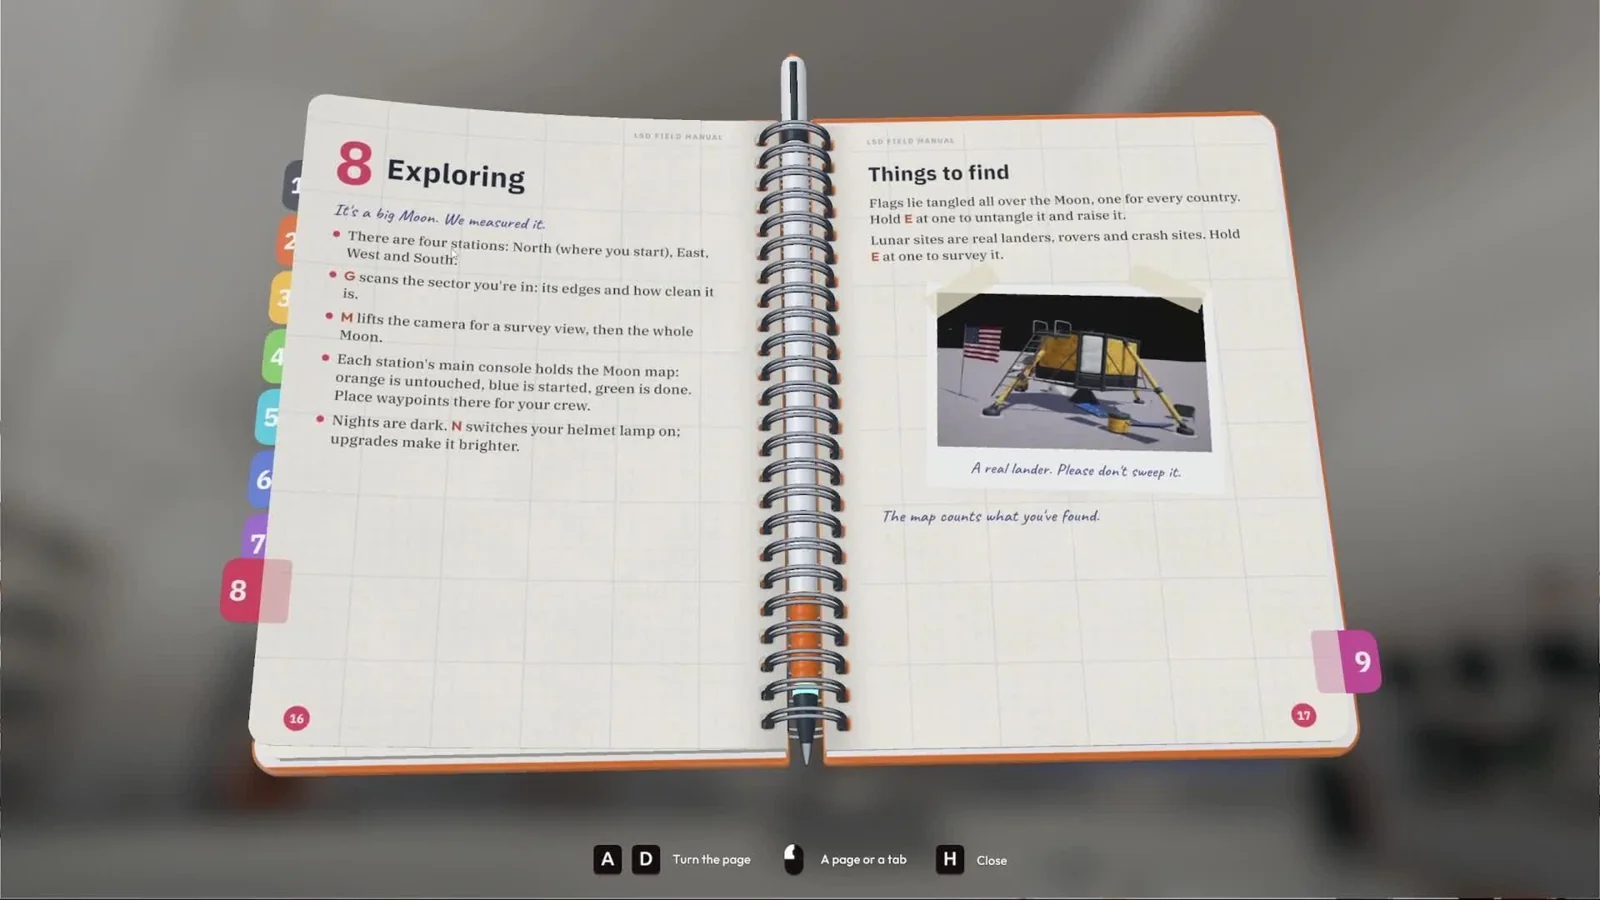
Use the Teleport panel for discovered stations
The Teleport panel lists stations you have discovered. Inspect the named destination and its displayed travel price before selecting it. In the example above, West Station is available and its button shows a charge; read your own button rather than budgeting every journey from that example.
If the station you want is absent, discover it before expecting it in the panel. The field manual names North as the starting station, with East, West and South elsewhere on the Moon. Keep those names separate from a waypoint you placed yourself.
After travelling, check the station name and the destination marker again. A journey to another station can change which direction leads toward your earlier work. Set the next waypoint from the map at the station where you have arrived.
For a vehicle you left elsewhere, use the garage's recall interface. Since 1.0.3, owned vehicles can be recalled, stored and upgraded at any garage. That gives you a specific way to recover the vehicle after travel instead of searching around the wrong station.
Turn on night vision before following a dark route
Press N to cycle the helmet lamp, Night Vision Goggles and off. The goggles are a $350 suit upgrade introduced in 1.0.4. Open the supply wall when you need to buy the gear; helmet lamp upgrades were also moved there in that update.
With goggles active, the night is displayed brightly without shadows. Check the suit indicator beside the dust gauge to keep track of the selected lighting state. If repeated N presses make the scene dark again, continue through the cycle to the mode you want.
When driving, check the vehicle's light upgrades at the garage as well. The garage interface lists Floodlights for the selected vehicle. Use the lighting appropriate to the vehicle you are actually driving, then slow down near a ramp or conveyor crossing where the approach matters.
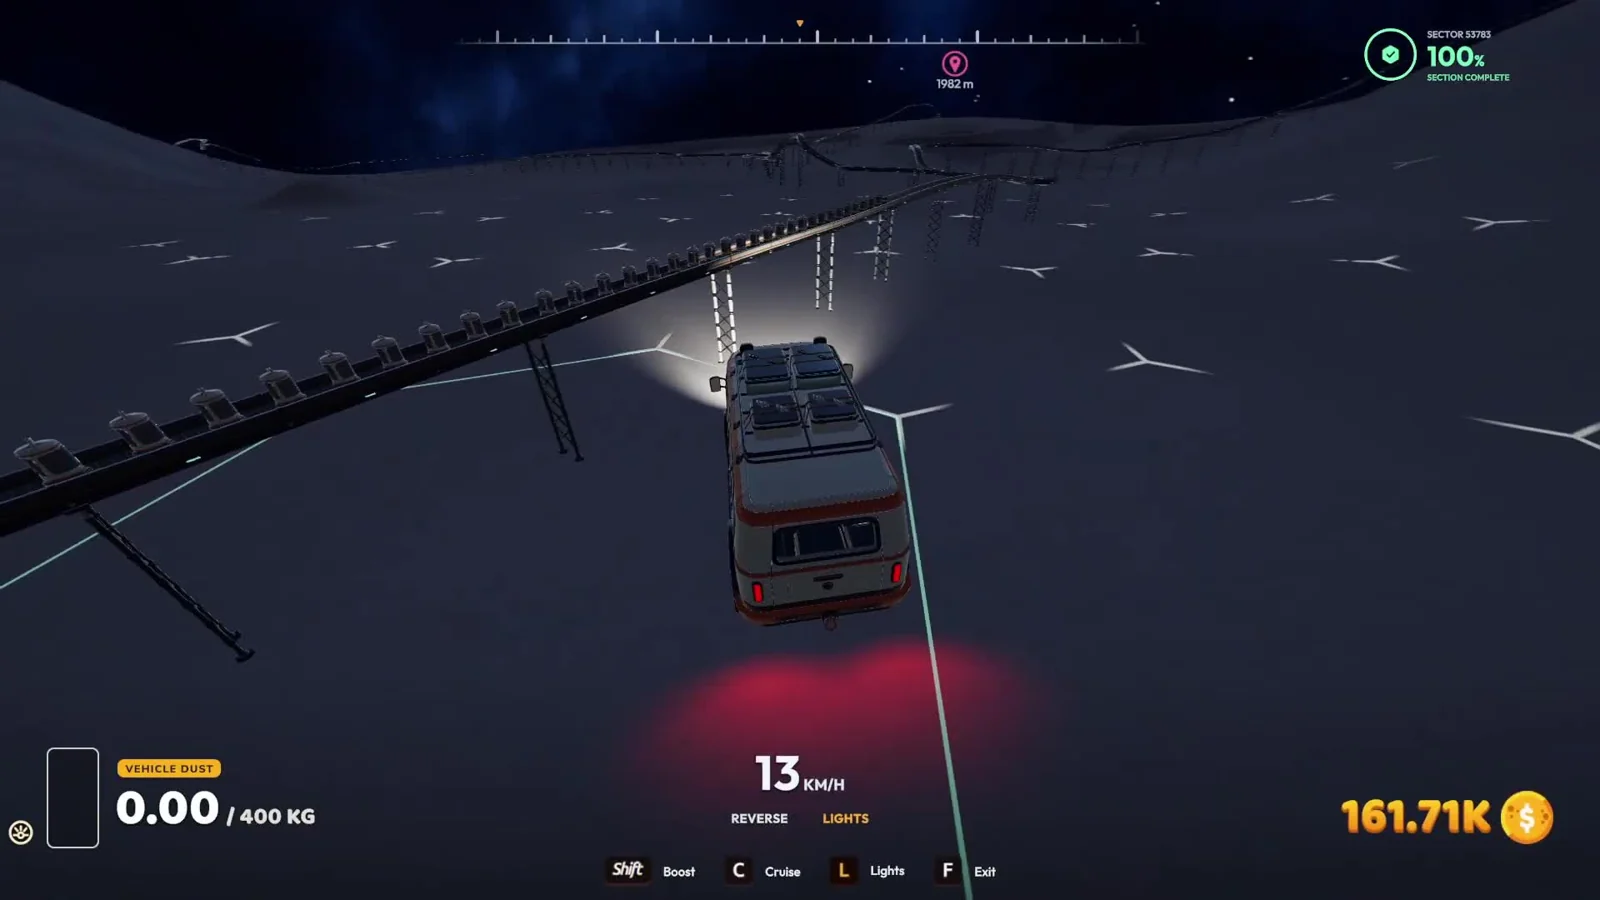
If the camera keeps swinging back behind the vehicle while you inspect a turn, open Settings → Controls and disable Vehicle camera follows behind. That option was added in 1.0.5. It lets you keep the camera where you turned it while lining up the next part of the route.
Finish the trip by checking your destination in the world: the station console for travel, the collector pad for a loaded vehicle, or the scanned hex for remaining cleaning. For a handheld load, use the packing and deposit sequence once you reach the station.
Sources
DragDrop Games: official patch notes · Play BIG or Die: in-game manual and garage walkthrough · VeedoDaMutt: map and building walkthrough.