167 published pages

Loftia Can't Click Anything, Zone Freeze, Save File Location & EA Patch #2 Fixes
Resolve Loftia's frozen cursor and menu wheel lock, find local AppData logs and configs, understand server saves, and verify Patch #2 fixes.

Loftia Fur Real? Cat Clues, Pet Friendship Cap, All Artifacts & Fishing Guide
Locate all 10 Fur Real? cat clues in Loftia City, check Patch #2's Lv 5 pet cap, finish All Artifacts Memory, and clear fishing bundles.

Loftia Project Station Level 3, Hydrofarm, Battery Lv 4, Seed Maker & Energy Guide
Unlock Project Station Lv 2 and Lv 3, build the Hydrofarm, upgrade Batteries to Lv 4, and adjust for Patch #2's Seed Maker move.

Loftia Gridfall Guide: Beneath the Surface, Atlas, Mita, Urbex Key & Blue Shrooms
Navigate Gridfall's Underworld drop hole to Atlas, unlock Mita's Urbex Key, repair the 3 red pillars, and reach Blue Shrooms.

Loftia Permission to Glide Quest, Glider, Bounce Shoes & Rail Boots Unlock Guide
Complete Milo's Refining Station checklist in Permission to Glide, craft your Glider, and unlock Bounce Shoes and Rail Boots in Patch #2.

Save Location, Hotfix v2.1.6, Launch Crash & Steam Deck Fixes
Windows and Steam Deck save paths, Smart App Control il2cpp crash fixes, Switch 2 Pro controls, Hotfix v2.1.6 notes, and 2027 Cross-Save.
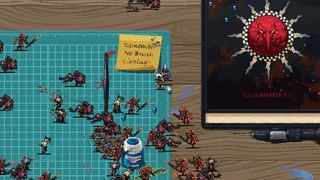
All 12 Paint Pots (Parade Ready), Stages, Enhancements & Arcana
Unlock routes for all 12 Citadel Paint Pots (Parade Ready), ’Eavy Metal stage triggers, 24 Enhancements, and 20 Arcana cards.

Secrets Menu Unlock Route, All 126 Incantations & 34 Relics
Two-run Secrets menu unlock paths for 40K and Age of Sigmar, every verified incantation code, all 14 riddles, and all 34 Relic drops.
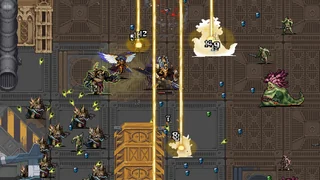
All 43 Characters & Exact Rescue Locations in Warhammer Survivors
Unlock routes for all 43 champions across 40K and Age of Sigmar, including exact directional map rescue steps and solved riddles.

Warhammer Survivors Weapon Evolutions & Follower Synergies (All 40 Combos)
All 38 passive-paired weapon evolutions, Gift weapons, the 4 max-level passives, and Squad Follower keyword stacking.
 Official press kit media © Mega Crit (megacrit.com/press-kits/slay-the-spire-2/)
Slay the Spire 2 v0.113.0 Card & Relic Reworks: Expect a Fight, Expertise & Memento Mori
Complete breakdown of Slay the Spire 2 beta v0.113.0 card and relic reworks: Expect a Fight, Forgotten Ritual, Expertise, Memento Mori, Power Cell, and Guiding Star fixes.
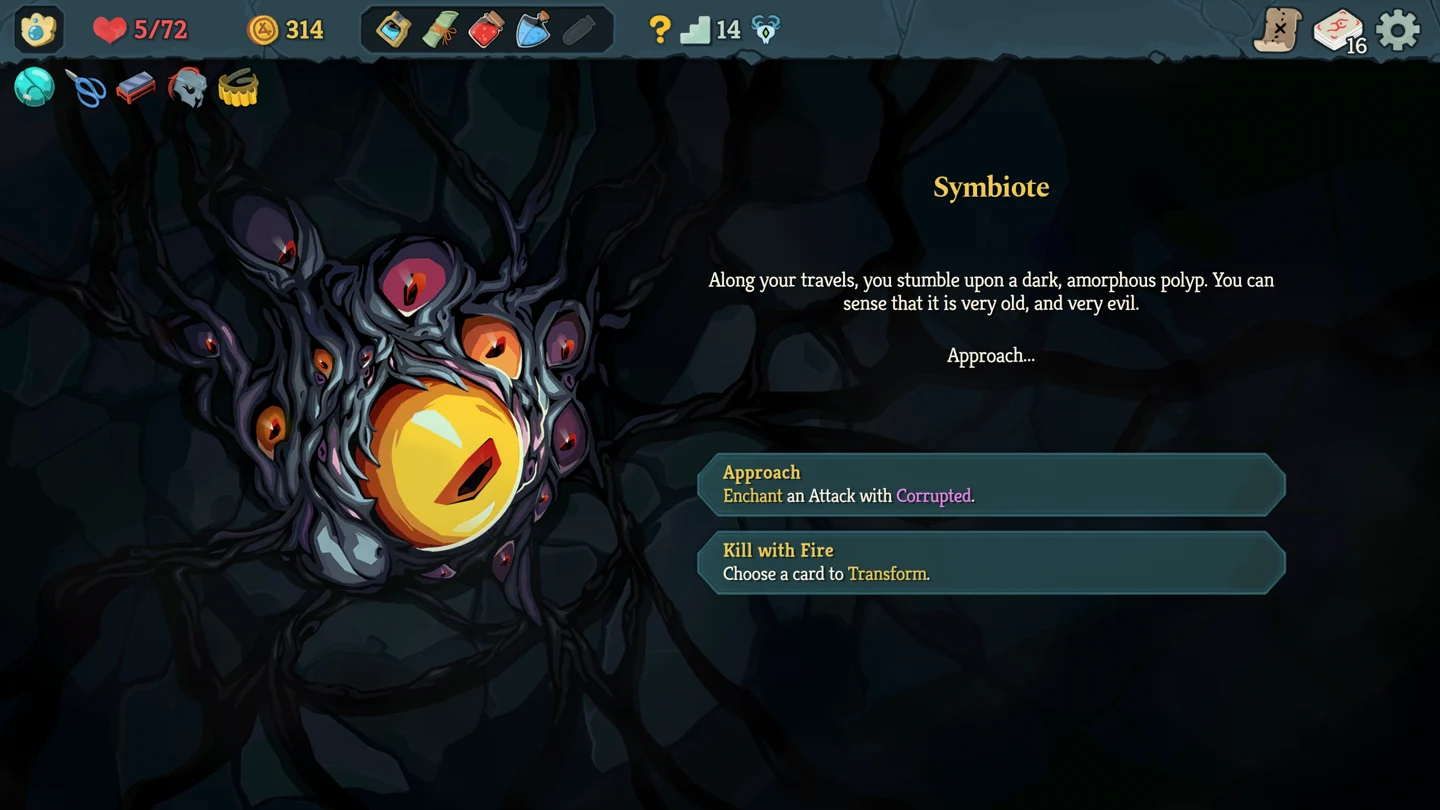 Official press kit media © Mega Crit (megacrit.com/press-kits/slay-the-spire-2/)
Slay the Spire 2 v0.113.0 Events & Ancients Guide: New Relics, Dowsing Rod & Zen Weaver
Every new event, event card, event relic, and Ancient change in Slay the Spire 2 v0.113.0—including Waterfall of Obvious Secrets, Museum of Torture, Dowsing Rod, and Zen Weaver.
 Official press kit media © Mega Crit (megacrit.com/press-kits/slay-the-spire-2/)
Slay the Spire 2 Dread Mode Guide: Ascension 10 Unlock, Boss Buffs & Curses
Unlock Dread Mode in Slay the Spire 2 v0.113.0 by reaching Ascension 10 on all characters including The Fool, counter Boss Act buffs, and survive stacking Curses.
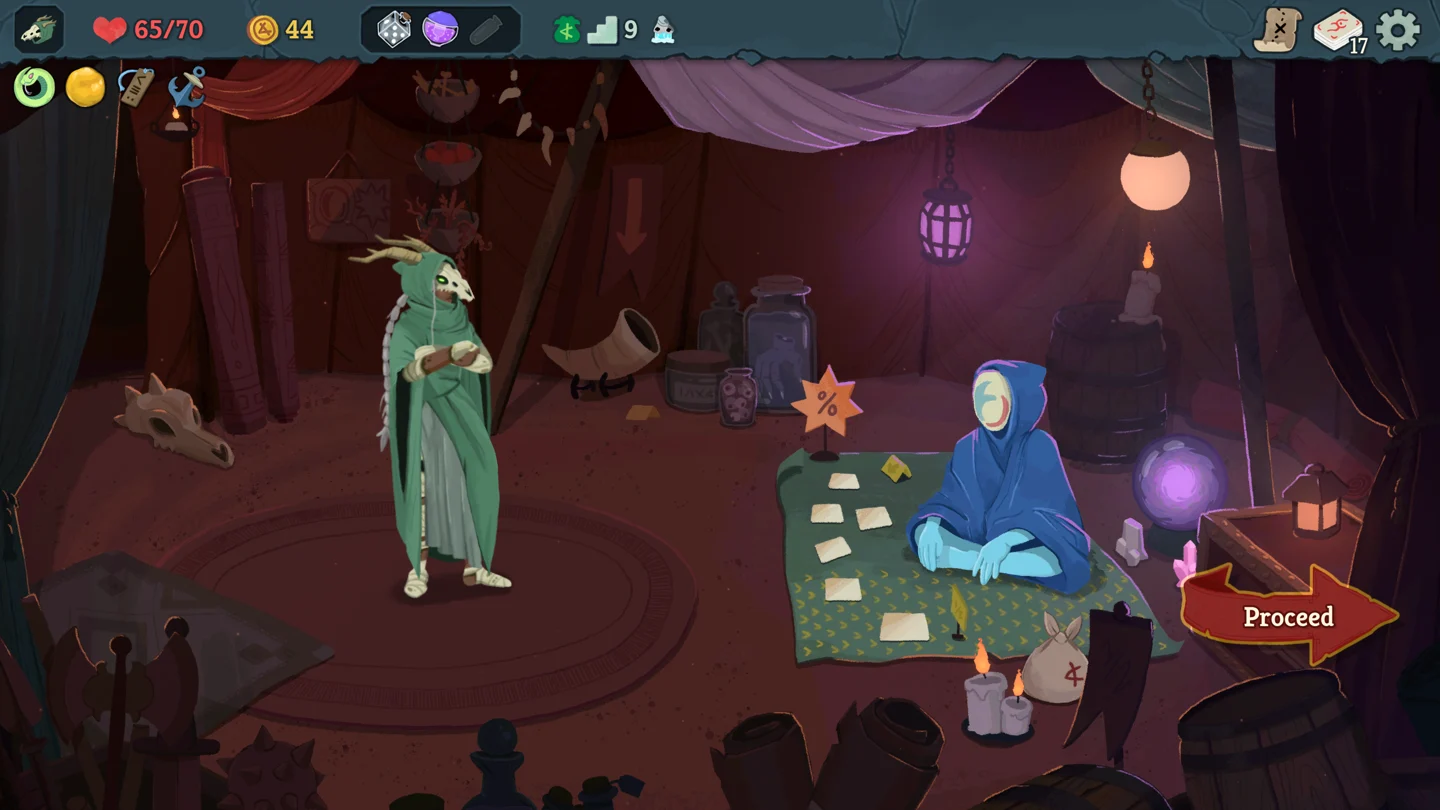 Official press kit media © Mega Crit (megacrit.com/press-kits/slay-the-spire-2/)
Slay the Spire 2 Blitz Mode Guide: How to Unlock, Goldless Merchant & Ascension
Unlock Blitz Mode in Slay the Spire 2 v0.113.0, navigate the mapless run structure, use the reworked Goldless Merchant, and clear all 5 shared Ascension tiers.
 Official press kit media © Mega Crit (megacrit.com/press-kits/slay-the-spire-2/)
Slay the Spire 2 The Fool Guide: Arrow, Impaled Retrieval & Tarot Cards (v0.113.0)
Play The Fool on Slay the Spire 2 beta v0.113.0: manage the Arrow and Impaled retrieval loop, trigger Bow Smack energy refunds, and sequence Tarot card swings.
 Publisher gameplay screenshot © Iron Gate AB / Coffee Stain Publishing
Valheim Black Metal Smelting & Logistics Guide: Blast Furnace, Longboat Freight & Serpents
Automate Black Metal Scrap processing with the Blast Furnace and Artisan Table, manage non-teleportable metal freight across Longboat routes, and farm Sea Serpents.
 Publisher gameplay screenshot © Iron Gate AB / Coffee Stain Publishing
Valheim Plains Yagluth Guide: Fuling Totem Raids, Fire Wine & Frostner Damage Matchup
Infiltrate high-tier Fuling villages for 5 Fuling Totems, brew Fire Resistance Barley Wine, summon Yagluth at the megalith hand, and exploit blunt-frost damage weaknesses.
 Publisher gameplay screenshot © Iron Gate AB / Coffee Stain Publishing
Valheim Mountain Silver Mining & Moder Guide: Wishbone Pings, Vein Collapse & Dragon Eggs
Locate underground silver with Wishbone audio-frequency pings, execute instant vein collapses, transport 200kg Dragon Eggs, and defeat Moder with archery mechanics.
 Publisher gameplay screenshot © Iron Gate AB / Coffee Stain Publishing
Valheim Mistlands Walkthrough: Infested Mines, 9 Sealbreaker Fragments & Black Forge Magic
Master Mistlands navigation with Wisplights, clear Infested Mines for Black Cores and 9 Sealbreaker Fragments, extract Yggdrasil Sap, and craft Eitr magic weapons.
 Publisher gameplay screenshot © Iron Gate AB / Coffee Stain Publishing
Valheim Ashlands Guide: Drakkar Ship, Boiling Ocean & Charred Fortress Sieges
Survive the Ashlands boiling sea, construct the Drakkar vessel, establish Shield Generator beachheads, and breach Charred Fortresses with Battering Rams.
 Keen Games official gameplay press asset
Enshrouded Kindlewastes Mining Guide: Iron Ore, Obsidian & Lapislazuli Routes
Farm thousands of Iron Ore, Obsidian, Sulfur, and Lapislazuli in minutes with optimized Kindlewastes mining cave routes, mining pickaxe durability, and Masonry tools.
 Keen Games official gameplay press asset
Enshrouded Best Warrior Build: Tanking, Parry Windows & Stagger Break Math
Dominate high-level Elixir Wells with an optimized 1.0 Warrior build: 2H Hammer stagger loops, frame-perfect parry timings, Paladin armor, and Constitution stacking.
 Keen Games official gameplay press asset
Enshrouded Base Building Guide: Comfort 70, NPC Workshop Grid & Fast Travel Hubs
Optimize your Enshrouded base with Comfort Level 70 shelter buffs, efficient NPC workshop placement, automatic kiln/smelter loops, and strategic Flame Shrine teleport hubs.
 Keen Games official gameplay footage
Enshrouded Best Mage Build Guide: Eternal Spells, Staff Ratios & Infinite Mana
Master the endgame Level 25-30 Wizard build with Eternal Acid Bite, Eternal Fireball, Ring of the Ancients mana leech loop, and Archmage armor synergies.
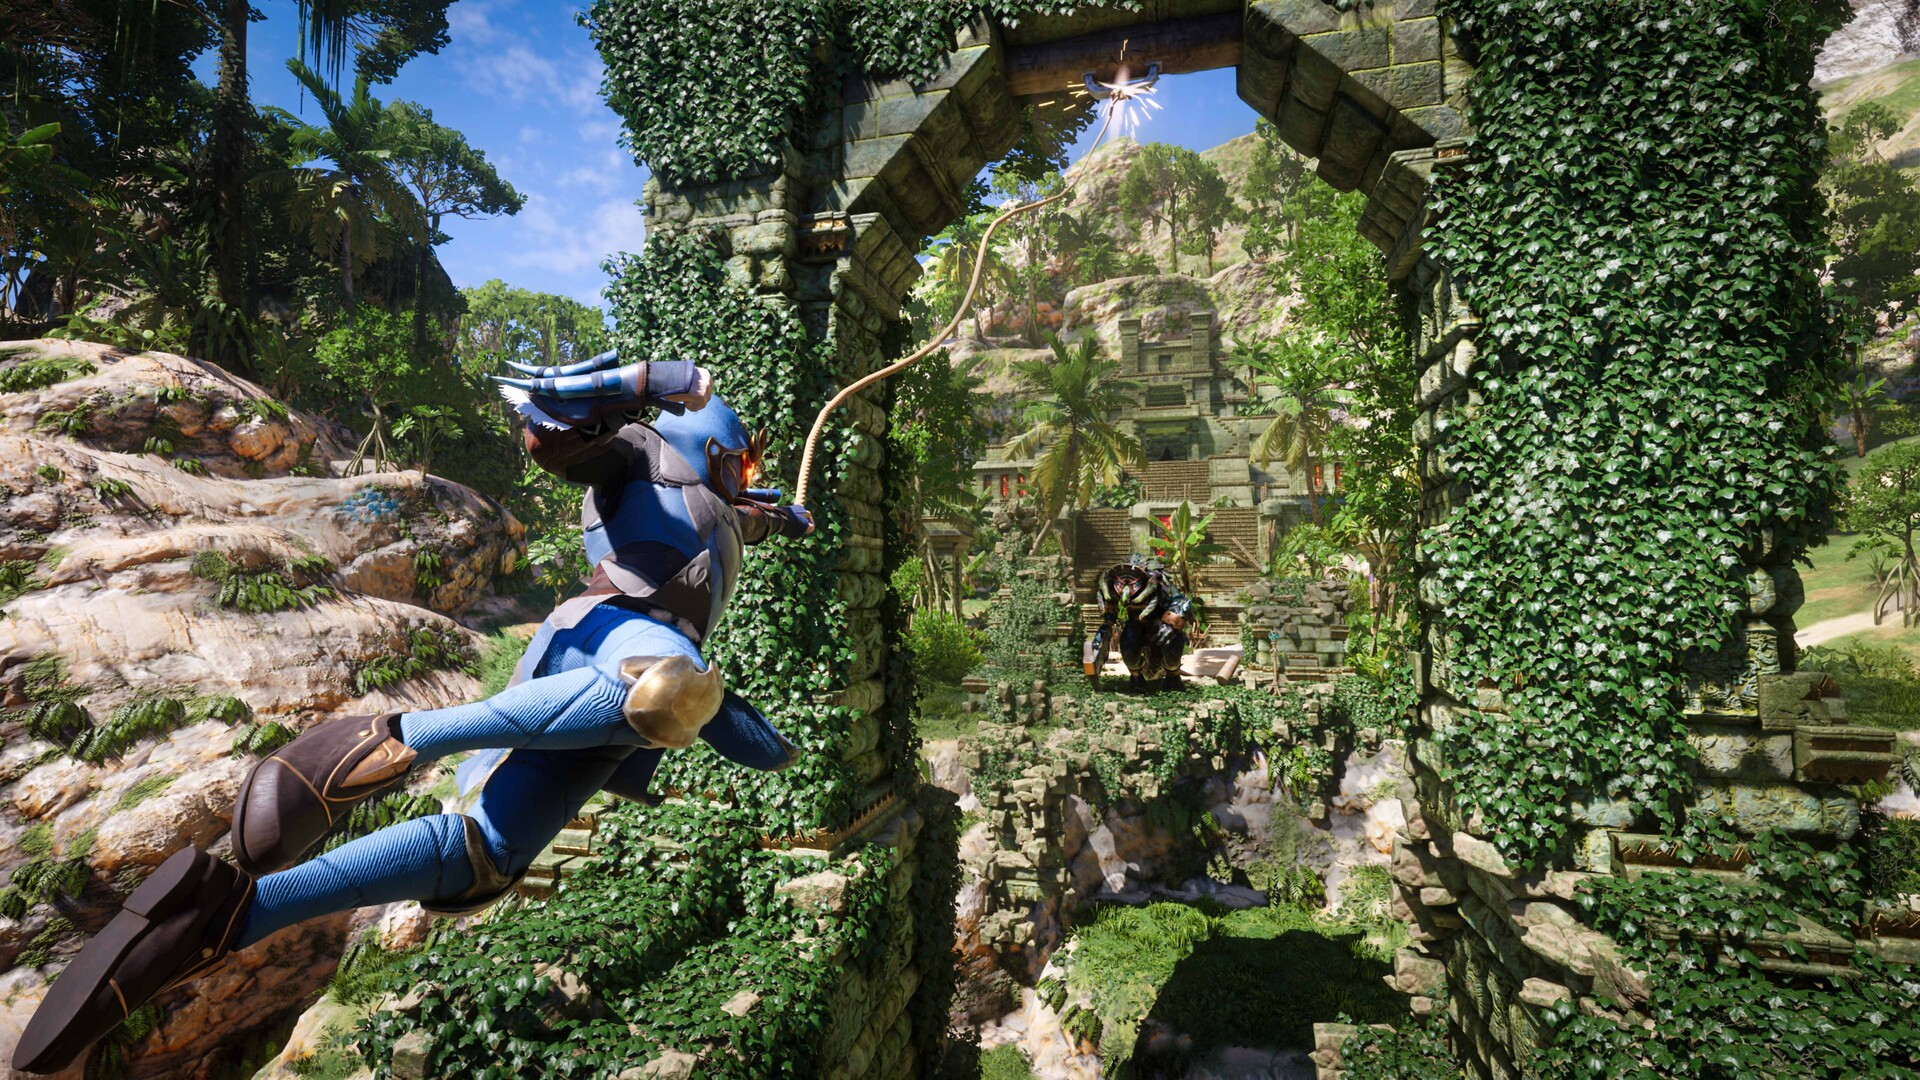 Keen Games official gameplay press asset
Enshrouded Flame Altar Level 6: Monster Heads, Sparks & Shroud Roots Guide
Upgrade your Flame Altar to Level 6 with exact Monster Head locations (Fell Sicklescythe, Wyvern, Monstrosity), Spark routes, and deadly Red Shroud clearance.
 Community gameplay capture via Steam / Coffee Stain Studios
Satisfactory 1.0 Dedicated Server Guide: Tick Rate, Desync & INI Optimization
Optimize your Satisfactory 1.0 dedicated server with 60 Hz tick rates, Engine.ini network bandwidth tuning, and high-speed conveyor desync fixes.
 Coffee Stain Studios official gameplay press asset
Satisfactory Zero-Waste Nuclear: Ficsonium Fuel Rod Closed-Loop Guide
Eliminate radioactive waste in Satisfactory 1.0 using the complete Ficsonium recycling loop, Particle Accelerator recipes, and AWESOME Sink termination.
 Coffee Stain Studios official gameplay press asset
Satisfactory Somersloop Matrix: 2x Production Doubler Machine Priorities
Maximize the 2x production multiplier in Satisfactory 1.0 with the complete Somersloop allocation matrix, machine power penalty math, and Alien Power Augmenters.
 Coffee Stain Studios official gameplay press asset
Satisfactory Rocket Fuel Power Plant: Exact Blender Ratios & Generator Scaling
Build a high-efficiency Satisfactory 1.0 Rocket Fuel power plant with exact Blender recipes, Nitric Acid loops, and 250% Fuel Generator overclock scaling.
 Coffee Stain Studios
Satisfactory Dimensional Depot: Upload Speed & Research Costs
Check the 15–240/min upload rates, separate speed and capacity research, connect storage belts and troubleshoot missing Depot materials.
 Pocketpair official gameplay screenshot / Steam press asset
Palworld Dedicated Server Breeding Settings: PalWorldSettings.ini Guide & Lag Fix
Configure PalWorldSettings.ini for instant egg hatching and expanded base capacity, fix ranch Pal freeze desyncs, and prevent dedicated server memory leaks.
 Pocketpair official gameplay screenshot / Steam press asset
Palworld Best Base Pals Tier List: Top Workers for Mining, Handiwork & Farming
Rank the best base Pals in Palworld by work suitability, collision hitboxes, nocturnal stamina, and task prioritization to build an un-stuck automated base.
 Pocketpair official gameplay screenshot / Steam press asset
Palworld Passive Skills Inheritance: The 2+2 Rule & God-Tier Worker Builds
Master genetic inheritance probability in Palworld: why clean 2+2 parents outperform 4+4 pairs, mutation chance, and step-by-step god-tier worker builds.
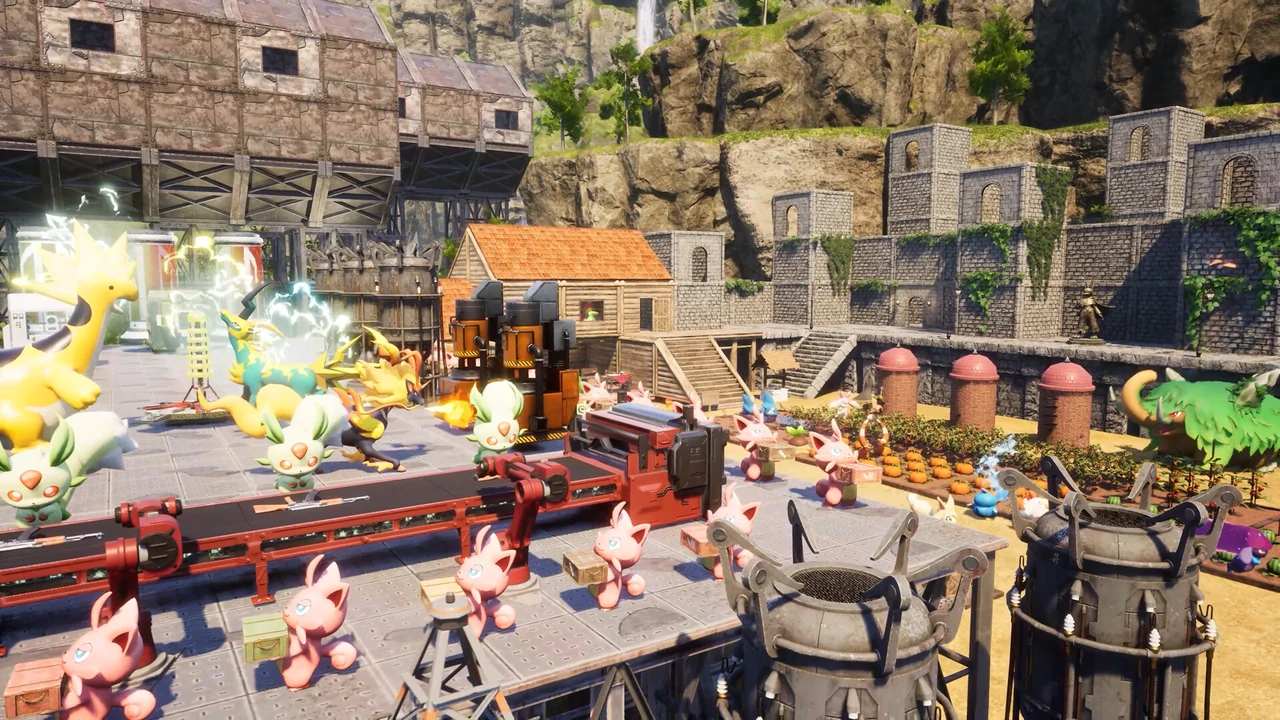 Pocketpair official gameplay screenshot / Steam press asset
Palworld Cake Crafting Automation: Exact Ranch Ratios, Wheat & Honey Farm Setup
Automate every Cake ingredient with optimal ranch and plantation worker ratios, Kindling cooking speed benchmarks, and infinite storage mechanics.
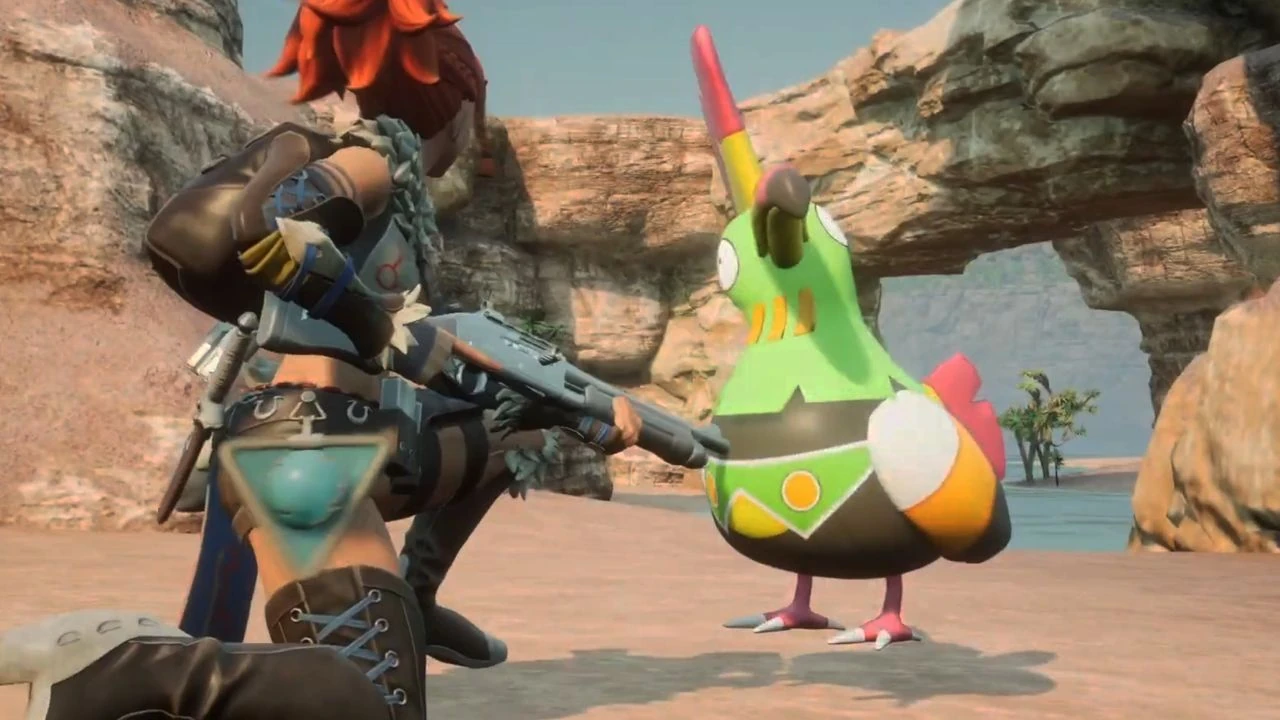 PC Gamer official gameplay capture / Pocketpair
Palworld Early Anubis Breeding Guide: 5 Starter Combos & Exact Ranch Setup
Unlock Handiwork 4 and Mining 3 before level 25 using 5 accessible starter breeding combos, optimal ranch placement, and thermal incubator settings.

Windblown Controller Lag and Co-Op Desync: How to Fix Stutters
Eliminate controller input delay, configure native Steam Input for Switch Pro and Xbox gamepads, and resolve co-op lobby desync on island teleporters following Update 0.9999999.
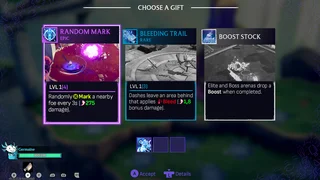
Windblown Hexed Gifts: Unlock Costs, Trade-Offs and Best Builds
Manage the risk and reward of Hexed Gifts, evaluate HP penalties against massive damage spikes, and prioritize Altar unlocks in The Ark under Update 0.9999999 economy rules.

Windblown Best Weapon Combos: Dual-Wield Pairings and Status Scaling
Pair fast combo engines like Fish Knife and Kunai with high-impact Alterattack finishers like Beatbolt and Heavy Blade. Features damage tables, status stacking, and dash cancels.

Windblown Crystallize Mechanics: 10% Execution and Co-Op Multiplier
Charge the Crystallize gauge, trigger the 10% enemy health execution prompt, restore energy, and synchronize co-op burst damage. Updated for Patch 0.9.4 threshold changes.

Windblown Alterattack Guide: Timing, Combo Strings and Force Fields
Master weapon-swap Alterattacks on the exact attack cue, crack high-difficulty enemy Force Fields, and maintain damage multipliers while dash-cancelling recovery frames. Covers Update 0.9999999 color tiers and hands-on input buffering tests.
 VeedoDaMutt
Moon Sweepers Moon Map: Waypoints and Teleports
Read cleaning colours, mark a return route, use discovered-station teleports, and turn on the right lighting for night travel.
 Play BIG or Die
Moon Sweepers Pack Dust: Q, Packagers and Selling
Pack a full tool, carry or empty capsules, sell through the deposit intake, and build a Packager route that reaches a station.
 MoonSweepers
Moon Sweepers Conveyors Not Working: Capsule Fixes
Trace stopped capsules through ports, mergers and receivers, with the packing fixes and co-op building changes through 1.0.5.
 Play BIG or Die
Moon Sweepers Garage: Unload Dust and Fix the Silo
Park on the collector pad, connect the silo outfeed, and recall owned vehicles after moving or rebuilding your garage.
 Play BIG or Die
Moon Sweepers Move Buildings: R Mode and Snapping
Move a garage or factory assembly for free, line machines up with foundations, and use the full-refund removal mode in 1.0.5.
 Pigeons at Play / Devolver Digital
Mycopunk Eye of the Storm: Keep Using Fungal Skewer
Tap utility for the skewer, build infection with Sporelift, and check your infection before firing Eye of the Storm.
 Pigeons at Play / Devolver Digital
Mycopunk ERROR_REDACTED: Make the Hidden Mission Appear
Check the Gunship Cannon’s own level and your secret-discovery state before searching the mission list.
 Pigeons at Play / Devolver Digital
Mycopunk Population Control: Next Site and Extraction
Read the changing objective, handle the wait between sites and finish by getting inside the Drop Pod.
 Pigeons at Play / Devolver Digital
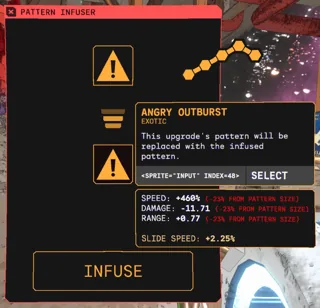
Mycopunk Pattern Infusion: Why Smaller Patterns Lose Stats
Compare pattern size, changed stats and board space before infusing an upgrade under the 1.0 rules.
 Pigeons at Play / Devolver Digital
Mycopunk Diffraction Driver: Unlock It and Use the Halo
Reach level 10, complete the resource unlock, and switch between the Driver’s wide cone and focused halo mode.
 Featherweight Games
Chained Beasts Goliath: Leap Cues & Deep Impact
Read Goliath’s jump, frontal warnings and crowded Germania arena. Set up Deep Impact by letting the leap kill an opponent while keeping the party clear.
 Featherweight Games
Chained Beasts Rhino: Stop Getting Dragged by the Chain
Keep the party chain out of the mounted Rhino’s route. Read the approach, avoid a wall trap and account for the 1.0.2 change to dodge and drag damage.
 Featherweight Games
Chained Beasts Squeeze Attack: Full Loop & Pop!
Make the chain squeeze instead of trip: weaken a standing enemy, complete the 360-degree wrap, then pull away. Includes the Pop! and kill-challenge distinction.
 Featherweight Games
Chained Beasts Healing: Potions, Water & Afflictions
Choose a Healer potion without ruining your next fight. Compare vision, movement and teammate effects, Medicine, the Surgeon and 1.0.2 water healing.
 Featherweight Games
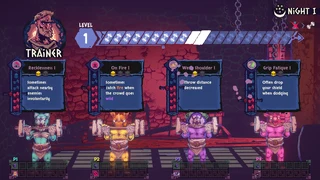
Chained Beasts Trainer: Shared XP & Overtraining
Read the shared XP bar, pace individual reps and avoid a costly training injury. Includes the 1.0.2 Tutorial/Pleb change and Trainer achievement conditions.

ARC Raiders Anvil Splitter Removed: Find the Amplified Anvil Upgrade
The ordinary Anvil has no Tech Mod slot after 2.0. Follow the Amplified Anvil route and compare selling an old Splitter with recycling it for repair material.

ARC Raiders Skill Tree Choices: One of Two, Two of Three and Locked Nodes
Read the middle and end-branch choice limits, check the 2.2 Spend Point prompt, and diagnose a malfunctioning skill before paying for a reset.
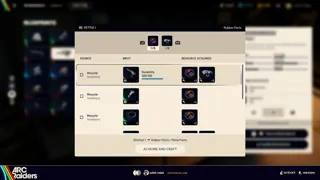
ARC Raiders Acquire Resources: Read Recycling Inputs Before Crafting
Open Acquire Resources from a missing-material craft, read Source, Input and Resource Acquired, and avoid consuming a weapon or item reserved for your next loadout.
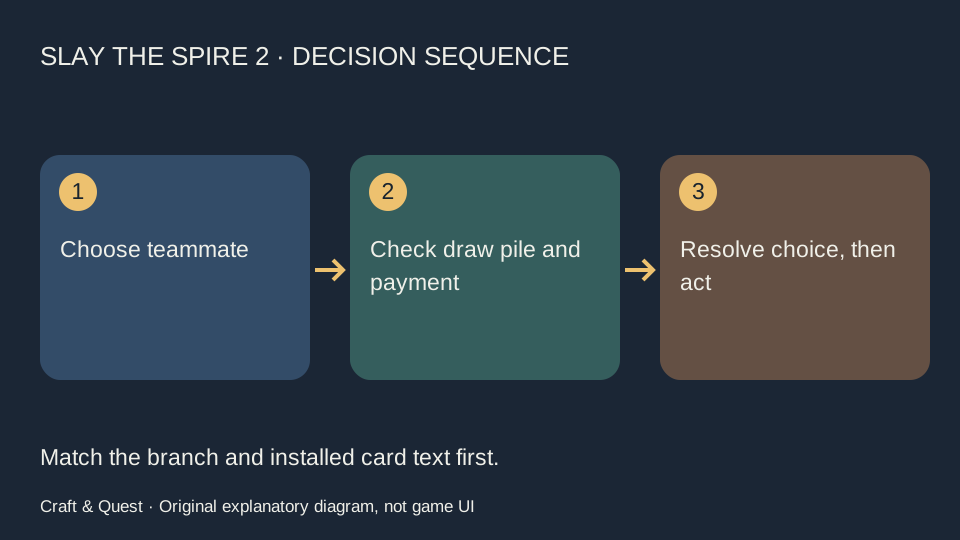
Slay the Spire 2 Co-op Tutor: Let the Right Player Choose the Needed Card
Beta branch: Tutor is a targeted teammate interaction. Coordinate the recipient, chosen draw-pile card and remaining turn resources before playing it.
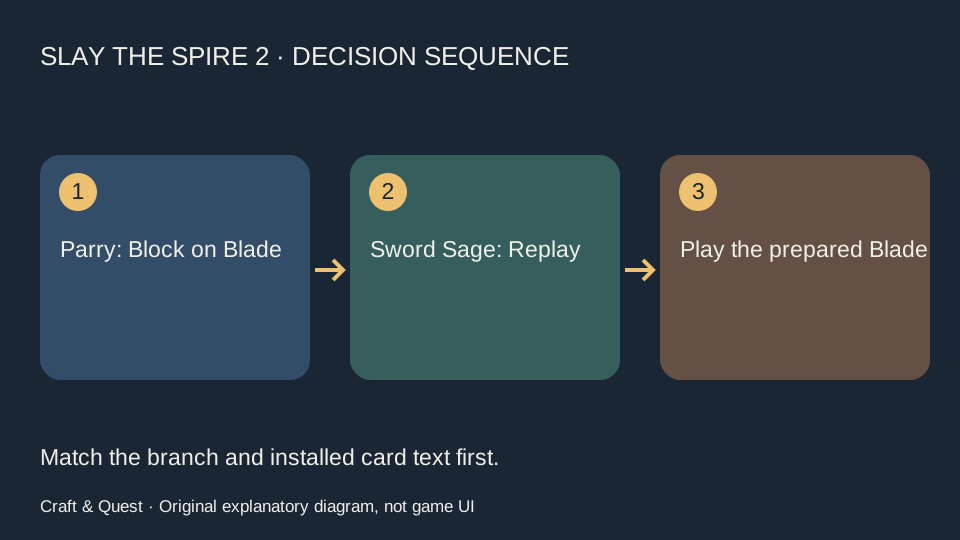
Slay the Spire 2 Regent: Parry, Sword Sage and Sovereign Blade Block
Main v0.107.1: Build a Blade turn that supplies defense as well as damage. Check the Parry and Replay interaction before copying an old Regent combo.

Monster Hunter Wilds Charge Blade: Phials, Shield Boost and Power Axe Loop
Connect sword energy, phial loading, shield boost and axe openings. Fix bouncing attacks, missing Super Amped Discharge and Power Axe that will not activate.
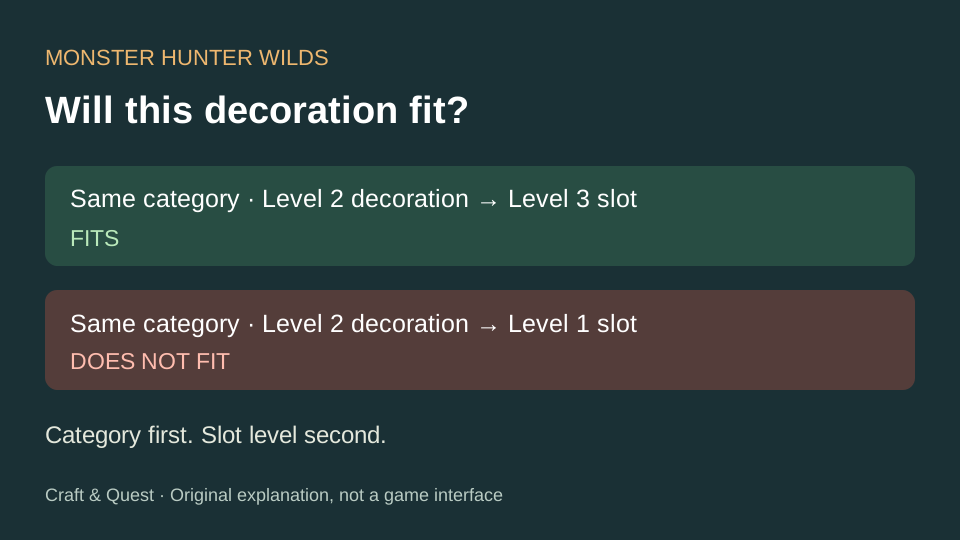
Monster Hunter Wilds Build Planning: Decoration Slots, Skills and Talismans
Fix decorations that will not fit, separate forged and appraised talismans, and preserve useful skill thresholds when changing armor.
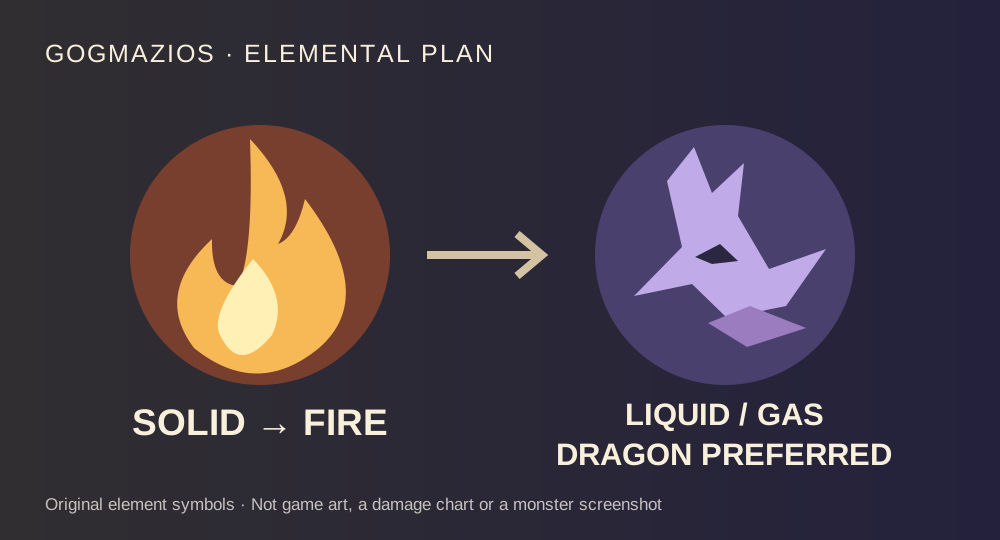
Gogmazios Fire or Dragon? Oil States, Two-Weapon Plan and Super Attack
Prepare Fire for solid oil, shift toward Dragon as Gogmazios changes state, and weaken the aerial attack before relying on a guard. Includes siege-tool and lava checks.

PUBG Hybrid Scope: Switch 1x/4x and Choose a Grip for Your Loadout
Use Sight Change to toggle the Hybrid Scope, separate camera shake from recoil, and understand the Tilted Grip versus Half Grip decision using the 41.1 attachment changes.

PUBG SLB Dawnbreakers Defense Build: Soups, Turrets and Healing Station
Keep the Capacitor alive with a resource plan, three complementary soup buffs and deployables that match the incoming Hungers. Includes recovery and fire-immunity checks.
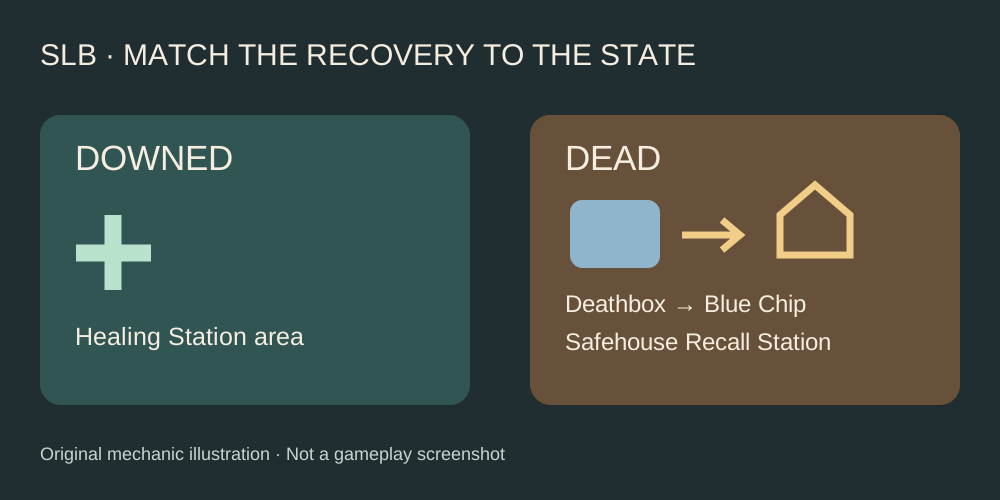
PUBG SLB Revive Guide: Healing Station or Blue Chip Recall?
Use the recovery method that matches a teammate’s state, then keep the objective covered while completing it.
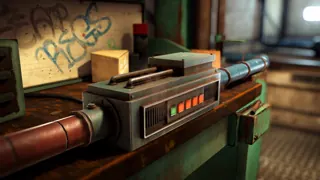
Rust Industrial Crafter Not Making the Right Item: Blueprint Order and Output Checks
Trace workbench eligibility, blueprint priority, ingredients and output capacity before rebuilding an automatic crafting line.
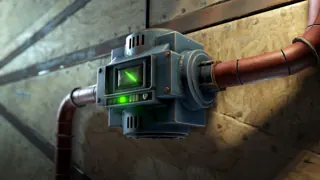
Rust Conveyor Min, Max and Buffer: Keep a Reserve Without Stalling Transfers
Separate source reserves, destination caps and batch thresholds. Use a small inventory test before connecting the full production line.

Warframe Rhino Starter Build: Iron Skin, Roar and a Mod Capacity Plan
Start a Rhino loadout with Intensify, Continuity and Streamline, then choose energy or range upgrades without breaking your Mod capacity budget.
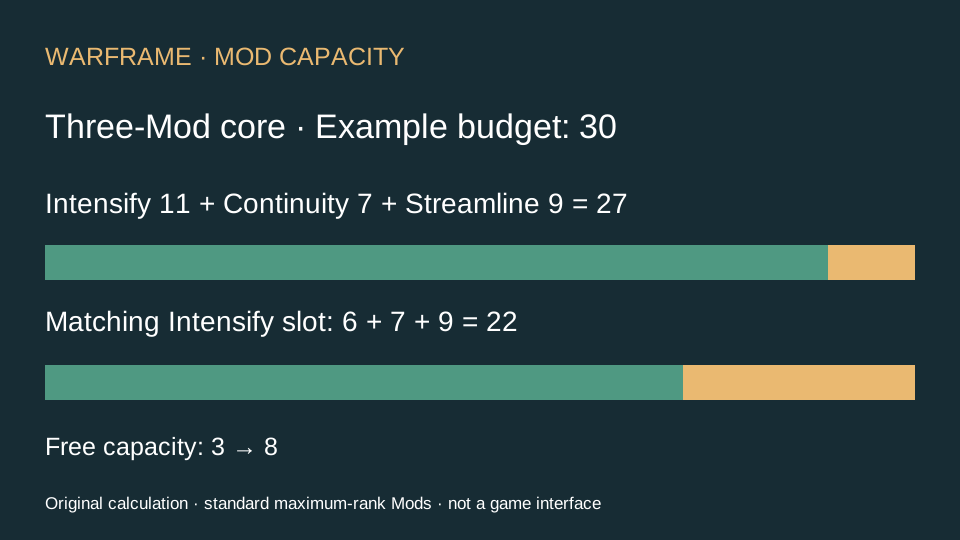
Warframe Mod Capacity: Fix a Build That Will Not Fit
Audit Mod drain, polarity and upgrade costs with a worked Rhino example before spending Forma or installing the wrong capacity upgrade.
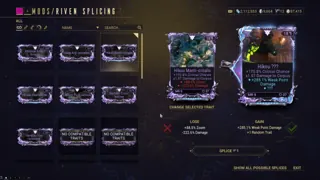
Warframe Riven Splicing: Why Rerolls Will Not Add More Traits
Check a Riven’s positive and negative trait layout before splicing. Understand the two-for-two replacement, locked configuration and the difference from paid trait locking.

Warframe Icebind Rewards: Frozen Keys, Crested Chest and Cryobells
Match Cryobells, Crested Frozen Keys and Frozen Keys to their uses. See which chest to open, how optional keys are earned and when entry keys are spent.

Warframe Icebind Revives: Tombstones, Surviving Players and Lost Key Eligibility
Understand why normal self-revives do not work, how survivors revive a fallen teammate and why staying dead affects bonus keys.
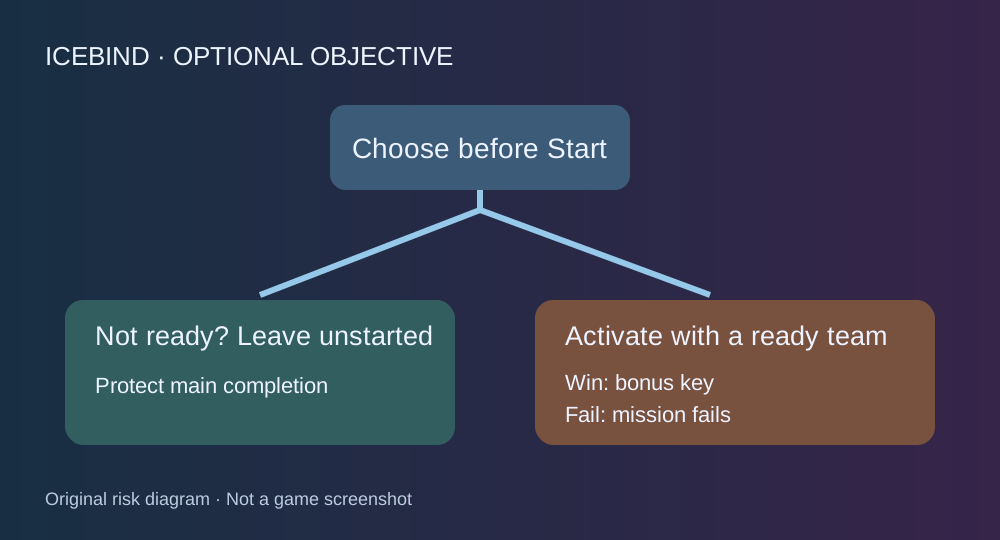
Warframe Icebind Side Objectives: Start Rules and Mission Failure
Side objectives are optional before activation, but failing an activated task fails the mission. Check the Start prompt, player requirement and extraction state.

Warframe Icebind Not Starting? Unlocks, Melica and Six-Player Squad Checks
Check quest and Elite requirements, form the party at Melica and resolve duplicate Warframes before starting The Icebind.

Valheim Bonemass Preparation: Iron Mace, Poison Resistance and Recovery
Prepare a Swamp-stage Bonemass loadout with an Iron Mace, poison resistance, food and a recovery route, without making later-biome equipment mandatory.
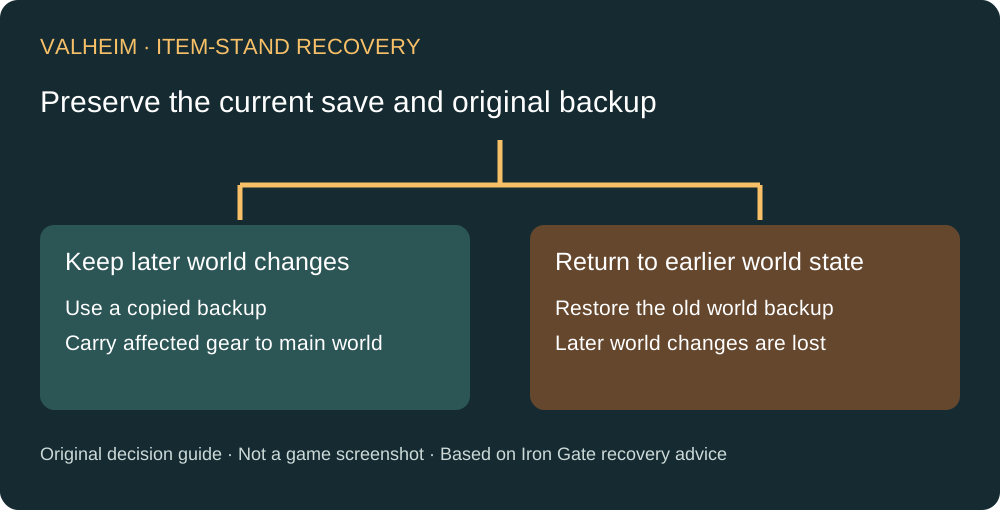
Valheim Item Stand Lost Upgrades: Recover Gear Without Rolling Back Everything
Compare the two official recovery routes for item-stand upgrades lost during the 1.0 save conversion. Preserve backups and understand what a full rollback removes.

Boltgun 2 Nurgle Guide: Avoid Ground Hazards and Poxwalker Swarms
Separate Nurgle’s floor threats from its ranged enemies, keep an escape lane, and check the October 20 fix for Nurgle Nightmare performance.

Boltgun 2 Scarab Occult Terminators: Reacquire Teleporting Enemies
Stop aiming at the old position after a Scarab Occult Terminator relocates. Find the new firing angle and manage nearby Rubric Marines.

Boltgun 2 Bloodcrushers: Survive the Split and Khorne’s Melee Rush
A Bloodcrusher can leave its rider or Juggernaut alive. Reacquire the survivor, watch circling Flesh Hounds, and finish enraged Berzerkers.

Boltgun 2 Nyra Guide: Use Fervent Slide to Escape, Attack and Gain Height
Give Nyra a clear slide exit, use the Power Sword during the approach, and turn slide momentum into a higher jump without landing in another pack.
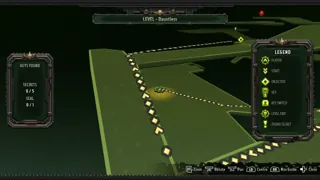
Boltgun 2: Find the Next Objective with the Automap and Navigation Guide
Use the automap to identify your objective, follow the Navigation Guide, and check campaign saves if Continue opens the wrong level.
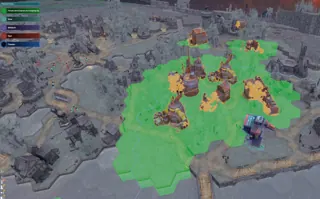
Clear toxic areas & control pollution
Compare accumulated pollution with its rate, protect cleanup supplies and treat existing toxic tiles as an access problem.

Water channel not filling?
Batch the channel at the intended depth, check the temporary water barrier and Debris storage, then verify the flooded route.
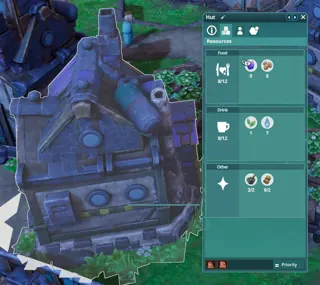
Buildings have no workers?
Use the house’s blue work-range outline, check filled job slots, then separate a normal break from exhaustion, strikes and toxic access.

Output full? Free Soot or Slag
Inspect every output branch, reconfigure existing storage when tool production stalls, and distinguish excess by-products from a shortage.

No power? Check connections
Trace the connection from generator to factory, then inspect fuel and Soot storage before adding another generator.
 Apog Plays · CC BY
The Witch’s Bakery First Sadness Door: Slide the Blue Block Left
Speak to Sadness, inspect the tall keyhole door and slide its lower blue section left to complete the keyhole symbol in this early Heart Palace puzzle.
 Apog Plays · CC BY
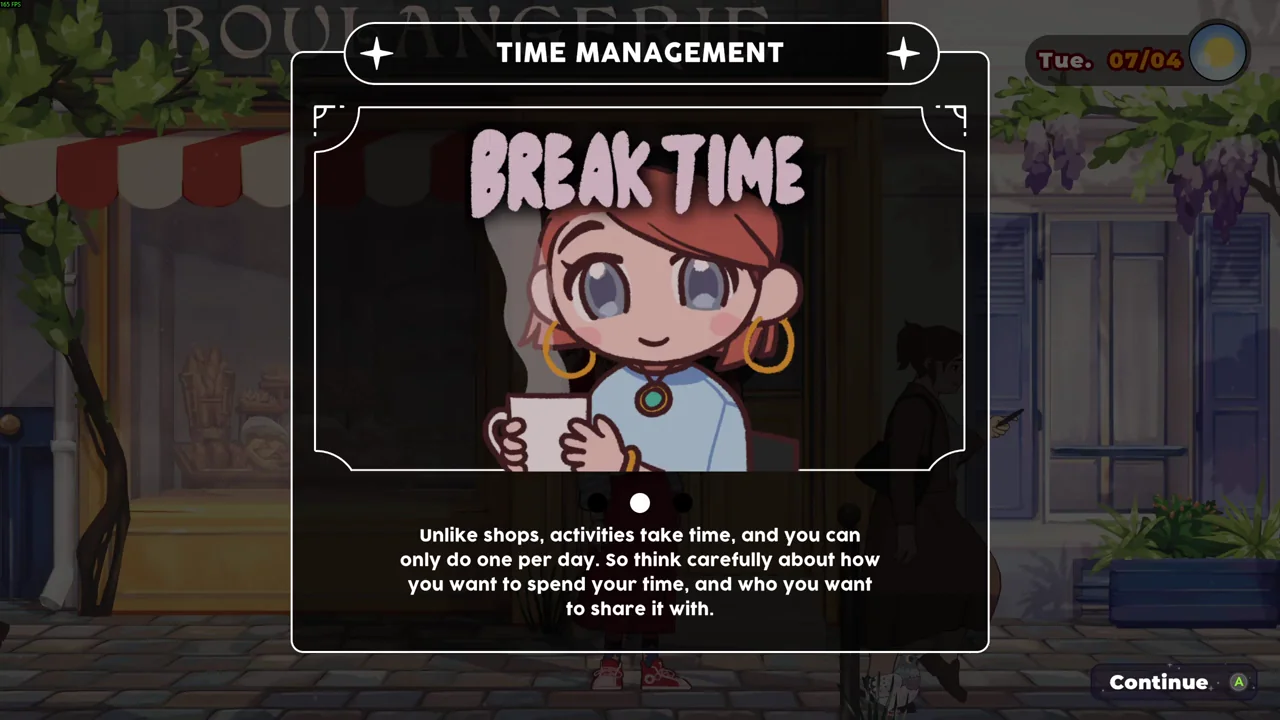
The Witch’s Bakery: Plan Evening Activities Around Energy and Time
Check an activity before spending the day’s outing, distinguish browsing from a timed activity, and use the correct post-patch Daniel energy value.
 Apog Plays · CC BY
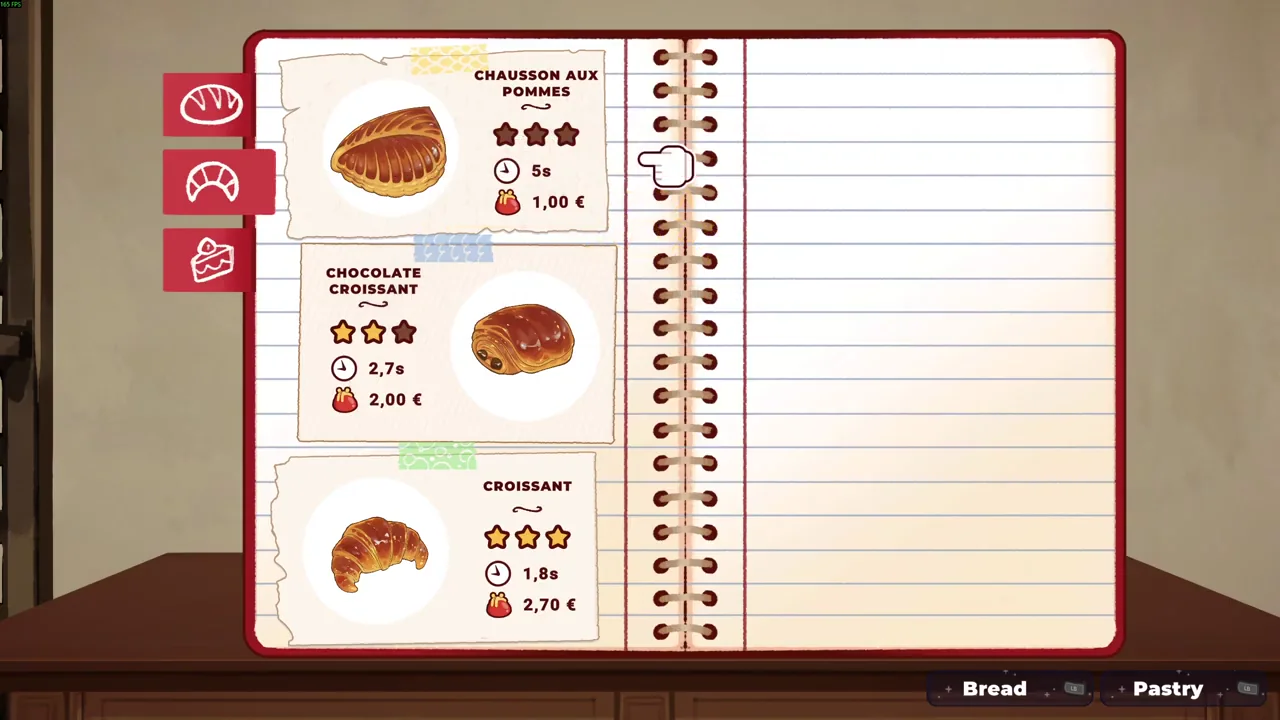
The Witch’s Bakery Atelier: Improve Recipes Without Confusing Them with Dough
Use the night-time atelier and recipe book, follow the recipe’s active step, then check the level shown in the book after completing the bake.
 Apog Plays · CC BY
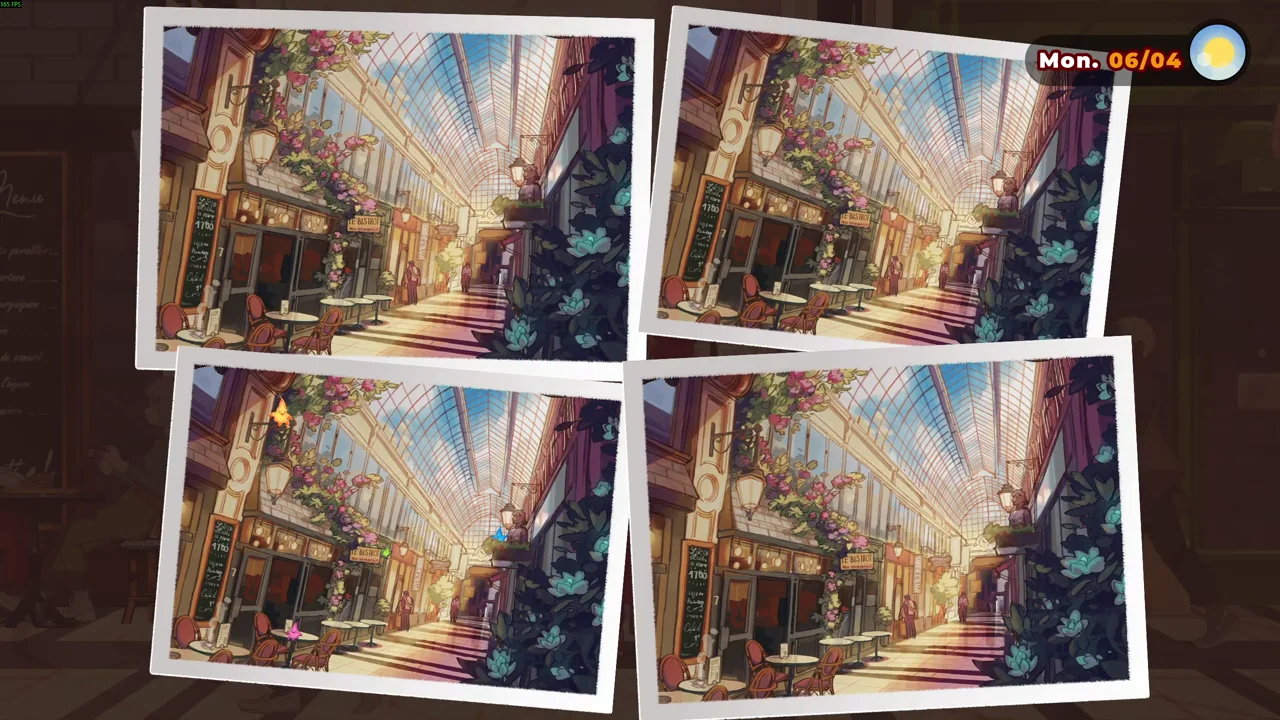
The Witch’s Bakery: Find Ghaldari’s Hidden Shop and the Twinkles Photo
Follow the Twinkles in the covered passage, inspect the postcard stand and select the photograph where they appear to reveal Ghaldari’s door.
 Apog Plays · CC BY
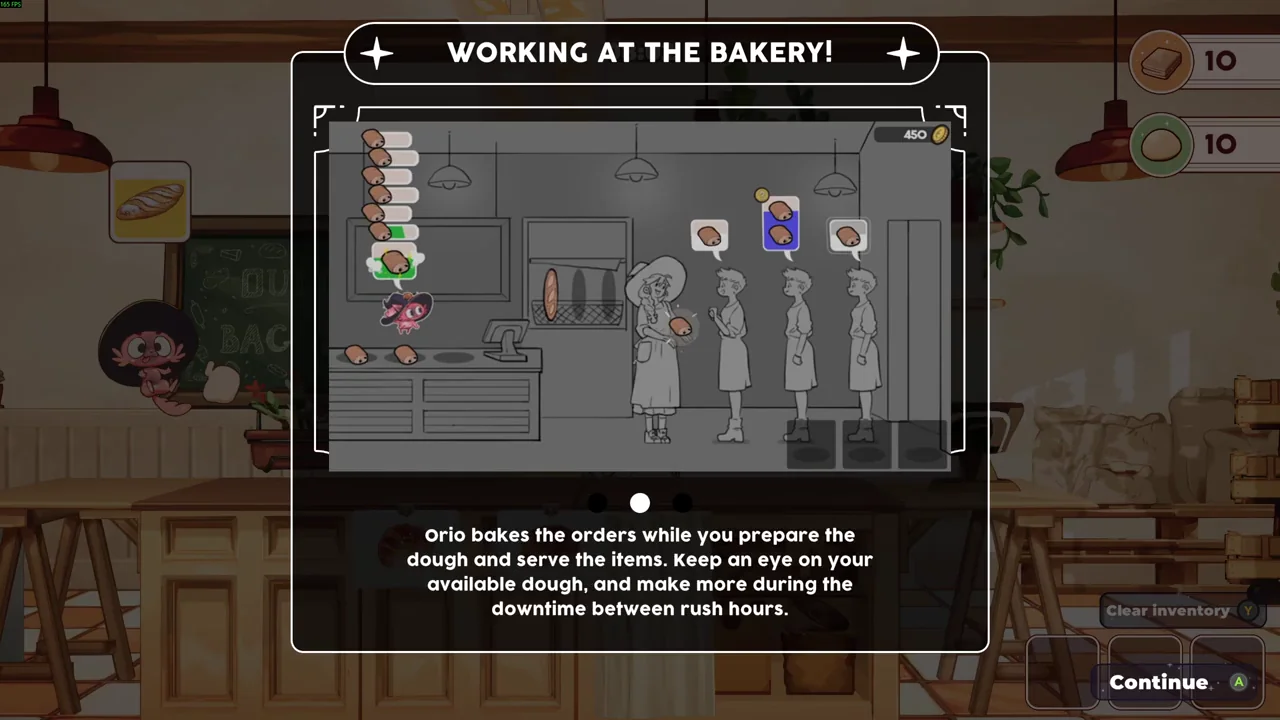
The Witch’s Bakery: Why Orio Stops Baking and How to Refill Dough
Check the separate bread and viennoiserie dough stocks, prepare the missing dough at the back of the bakery, and let Orio handle routine production.
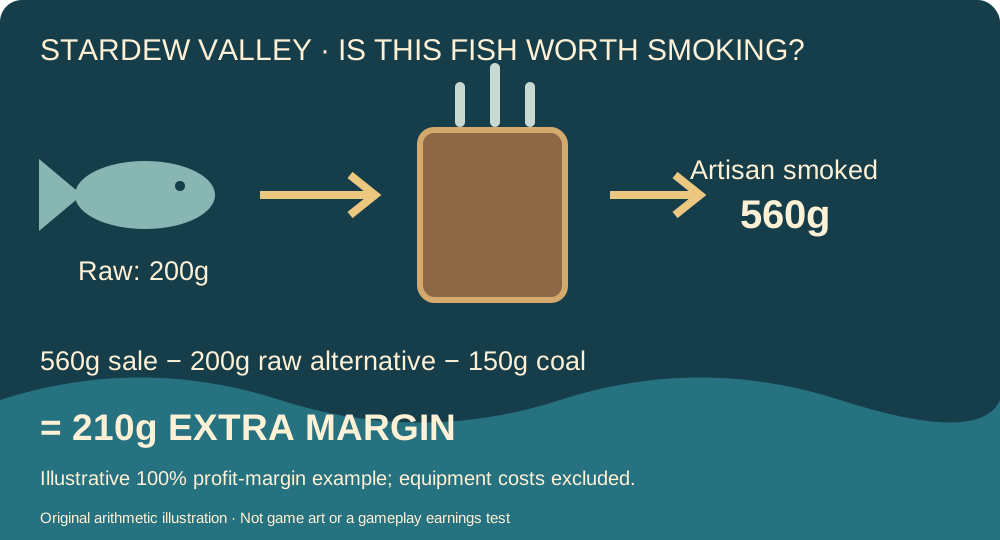
Stardew Valley Fish Smoker Profit: Coal Costs, Artisan and When to Sell Raw
Compare smoked fish against selling the same fish raw. Include coal cost, preserve fish quality, avoid double-counting fishing professions and plan the recipe investment.
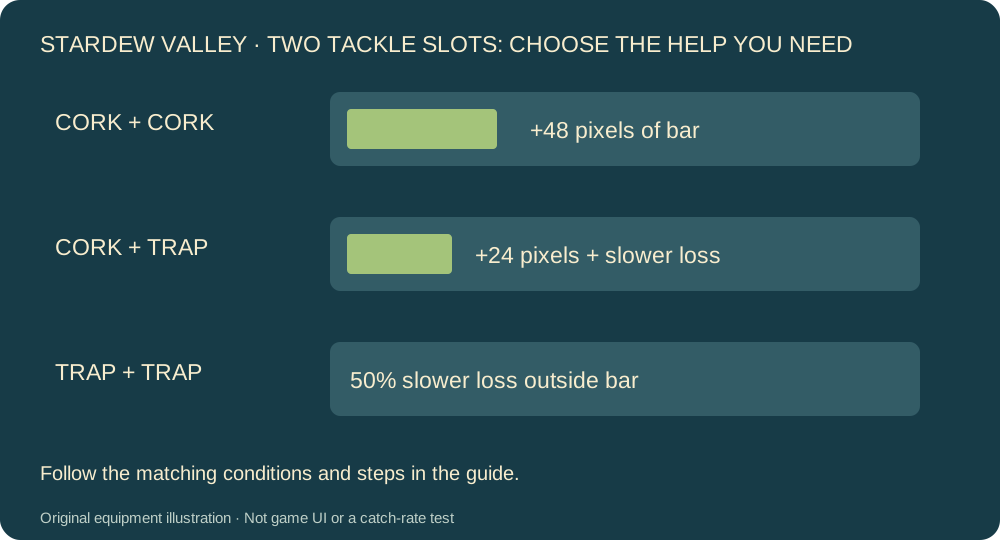
Stardew Valley Advanced Iridium Rod: Double Cork, Double Trap or Mixed Tackle?
Choose two tackle slots around the reason fish escape. Compare a larger bar, slower progress loss and a mixed pair, with mastery and durability checks.
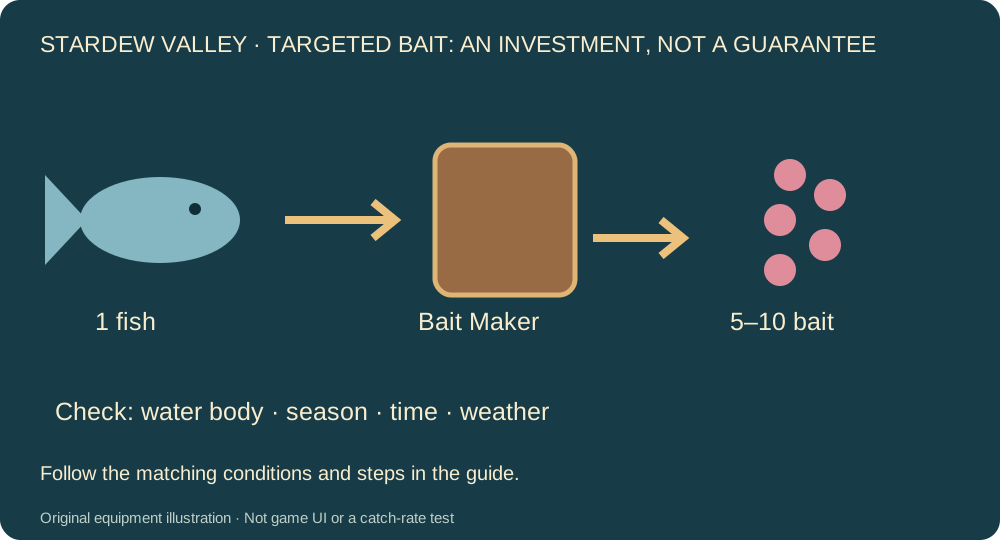
Stardew Valley Bait Maker: When Targeted Bait Is Worth Sacrificing a Fish
Make a small targeted-bait batch, check the target’s fishing window, and compare the sacrificed fish with the extra value you hope to catch.
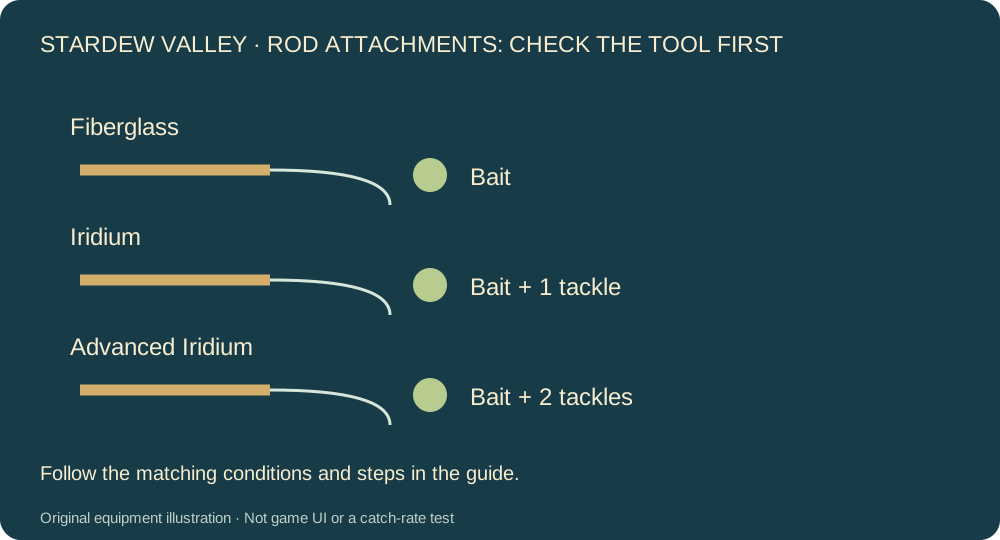
Stardew Valley Bait Won’t Attach? Check the Rod and Right-Click in Inventory
Use the inventory attachment action on a compatible rod. Compare bait and tackle slots before buying an upgrade or repeating a drag that only swaps items.
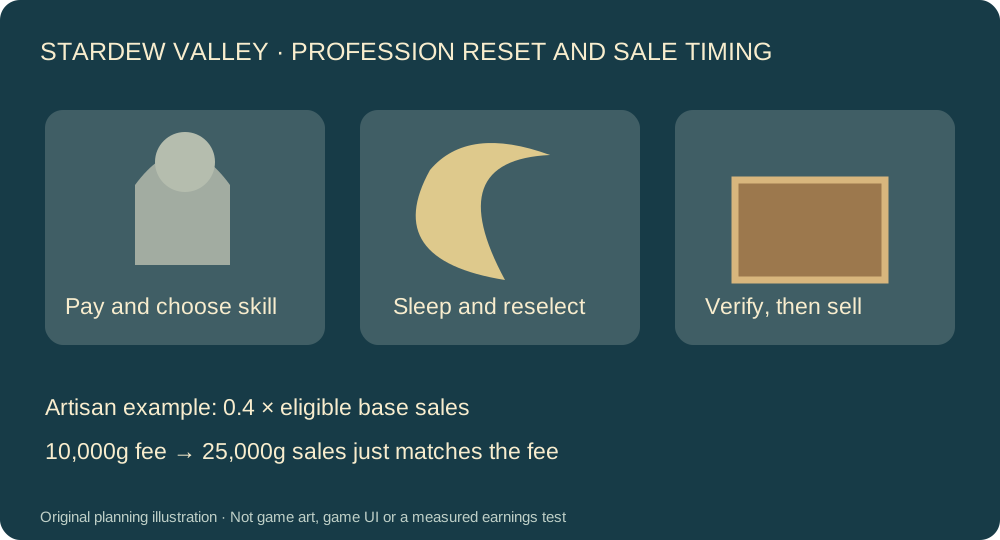
Stardew Valley Profession Change: Avoid the Shipping-Day Bonus Trap
Use the Statue of Uncertainty, plan the overnight choices and compare the 10,000g fee with an eligible Artisan batch before paying for a temporary switch.
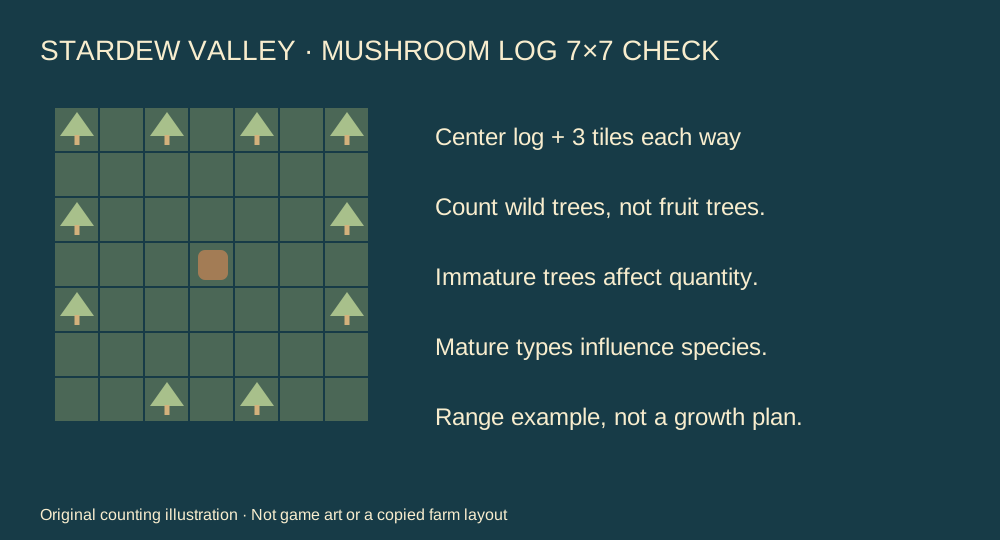
Stardew Valley Mushroom Log: Count the 7×7 Trees Before Chasing Purple Mushrooms
Separate quantity from mushroom type. Count nearby wild trees, distinguish saplings from mature trees, and keep a harvest path while planning the log area.

Stardew Valley Flower Honey: Keep the Bloom Until You Collect
Use the correct five-tile range, leave the flower standing through collection, and avoid turning valuable flower honey into lower-value fresh Mead.
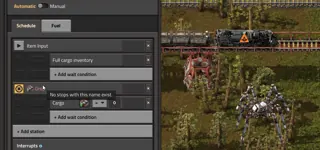
Factorio Train Destination Full or No Path? Check Limits, Names and Rails
Separate a full destination from a missing route. Check train reservations, disabled stops, exact names and rail direction before adding a depot interrupt.
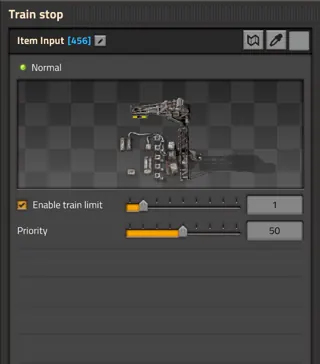
Factorio Train Stop Priority Not Working? Check Eligibility Before Raising It
Priority selects among eligible destinations; it does not override a full stop. Compare limits, reservations and equal-priority alternatives with a concrete dispatch example.
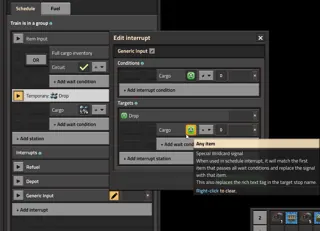
Factorio Generic Cargo Interrupt: Match the Item Icon to the Drop-off Name
Use the item wildcard in the cargo condition and destination name, distinguish an icon from typed text, and test the route with one cargo type first.
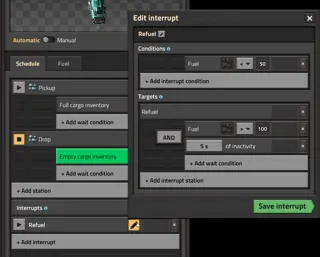
Factorio Refuel Interrupt Stuck? Check Fuel Type, Loading and Exit Conditions
Build a clear single-locomotive coal refuel rule, then diagnose repeat visits, early departures and a train that is fueled but cannot leave.
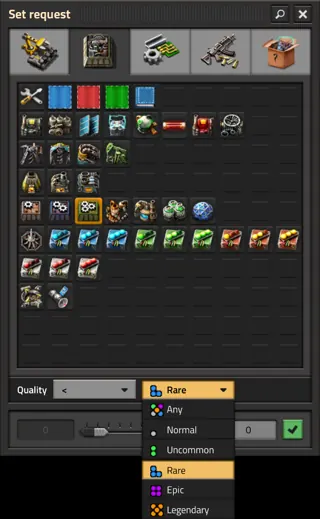
Factorio Assembler Rejects Quality Ingredients? Match the Recipe Tier
Check recipe quality, every solid ingredient and delivery filters. Keep quality generation separate from a recipe that requires an already matched tier.
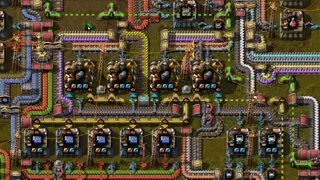
Factorio Pipeline Overextended: Split the Segment, Then Check the Pump
Use the pipeline overlay to locate the extent problem, split it with a powered directional pump, and distinguish a stopped segment from a low supply rate.
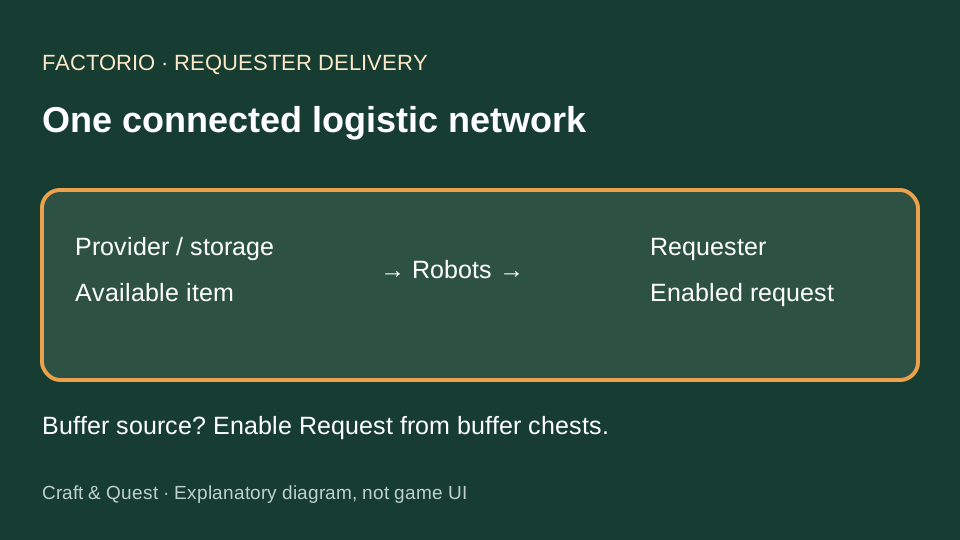
Factorio Requester Chest Not Working? Check Network, Supply and Circuit State
Diagnose zero deliveries separately from slow deliveries: orange coverage, connected roboports, available items, buffer permission and disabled requests.
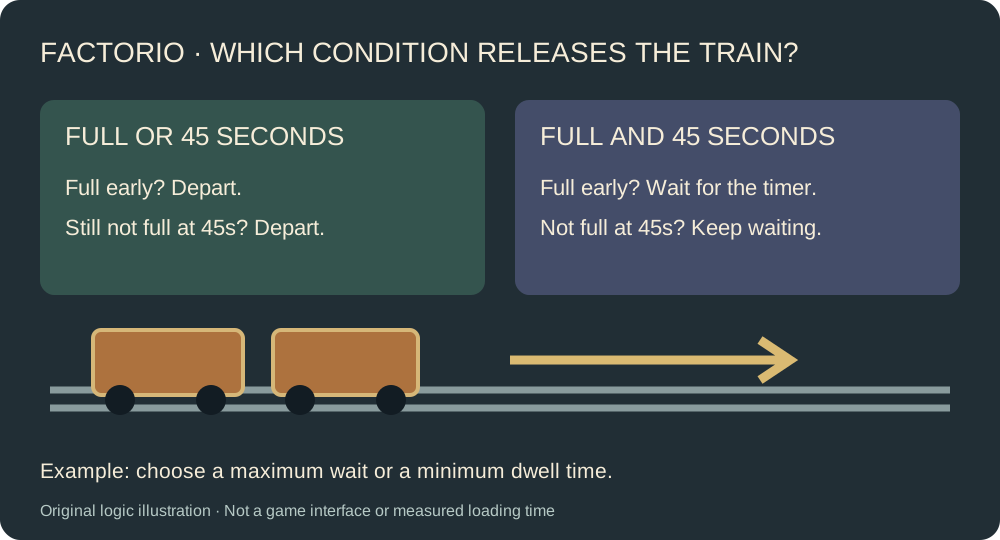
Factorio Train Leaves Too Early? Fix AND/OR Wait Conditions
Separate a timeout from a minimum dwell time, group AND terms correctly, and test the departure rule against simple true/false cases.
5 Easy-to-Miss Enshrouded 1.0 Changes: Armor, Repairs and Private Markers
Find missing armor recipes, understand renamed map markers, repair equipped shields at camp anvils, and stop trying to consume Antiseptic.

Enshrouded Puke Potion: Recipe and How to Replace Food Buffs
Craft 5 Puke Potions from 1 Poison Sack and 2 Stinging Nettle in personal crafting. One potion immediately clears all active food buffs; prepare the replacement meal before using it.
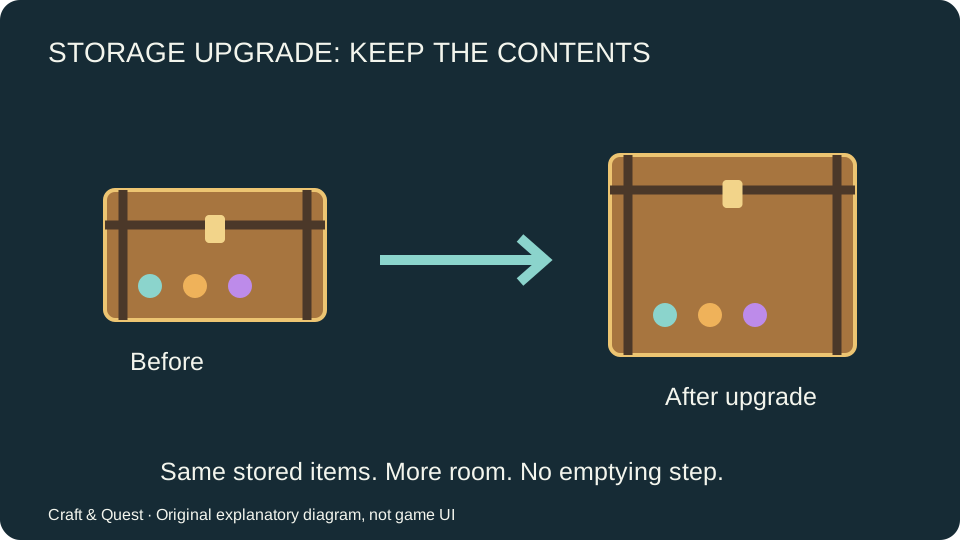
Enshrouded Chest Upgrade: Keep Items Inside in 1.0
Upgrade a chest without emptying it in Enshrouded 1.0. Compare chest sizes, Magic Chest conversion and new-chest recipes, with a materials planner.

Enshrouded Auto Loot: Enable Automatic Pickup and Check Exclusions
Open Settings → Game and enable Auto-collect scattered loot, or hold the interaction button to collect nearby loose drops on demand. Chests, defeated-enemy loot and special quest items still need their usual interactions.
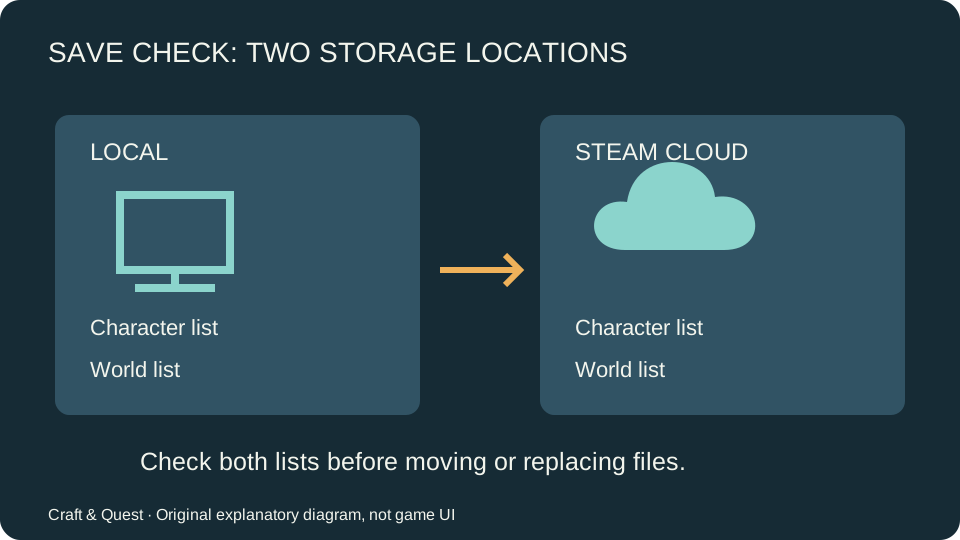
Enshrouded Saves Missing After 1.0: Storage Tabs and Hotfix 1.0.0.3
Look in both Local and Steam Cloud tabs for the expected character and world. If an Early Access character failed migration, update to Hotfix 1.0.0.3 (build 1273043): it adds migration fixes for invalid backpack entries and misplaced Flame Altars.
 Keen Games
Enshrouded Sparkworks Lightning Trap: Hit Both Buttons
Trace the two shootable targets through AND, open both exits and disable the lightning branch. Includes the four target states and checks for a trap that keeps firing.
 Keen Games
Enshrouded Sparkworks Water Room: Stop Filling & Drain
Wire the entrance lever, reset Trigger Area and inner button separately. Follow Toggle’s direct drain/exit branch and the NOT branch feeding water dispensers.
 Keen Games
Enshrouded Sparkworks Trapdoor Bridge: Start, Stop & Timing
Connect the bridge’s start and end areas, preserve the D Flip-Flop inputs and alternate trapdoors A/C against B with the 3s Clock and 0.7s Holds.
 Keen Games
Enshrouded Sparkworks Spawner: Open the Arena Exit
Trace the three-spawner arena, its player trigger and the OR → NOT exit rule. Diagnose a door held closed by one remaining spawner signal.
 Keen Games
Enshrouded Sparkworks Spike Traps: Wire the Timed Hallway
Wire three alternating spike traps and a separate exit timer. Includes the 5.5-second Hold, 1.5-second Clock and middle-trap NOT connection.
 Keen Games
Enshrouded Sparkworks Switchbox: Create & Edit Graphs
Open Sparkworks Graphs, create a graph, assign World Object nodes and use Reassign Object when a wire controls the wrong placed item.
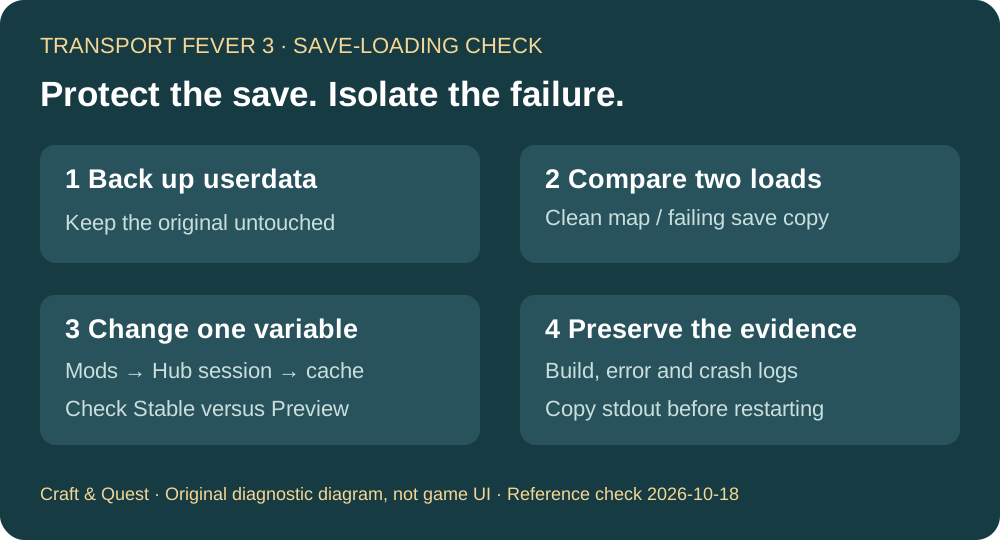
Transport Fever 3 Crashes Loading a Save: Stable vs Preview and Safe Checks
Separate a save-specific crash from a new-map failure, check the stable and preview builds, preserve userdata and collect the right crash log.
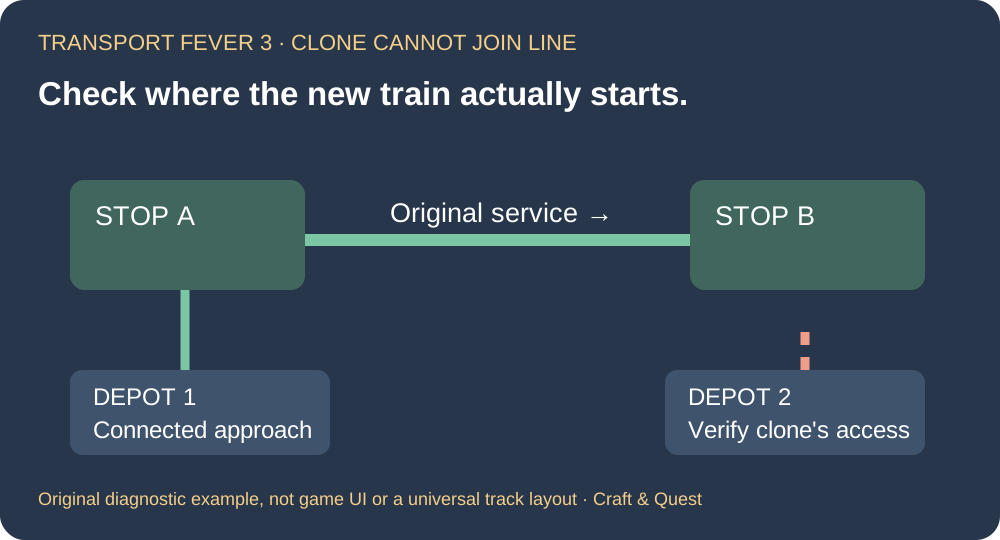
Transport Fever 3 Cloned Train Cannot Join a Line: Check Its Actual Depot
An existing train can run while its clone starts in an unsuitable depot. Locate the new vehicle, check its assigned destination and separate depot access from a broken line.
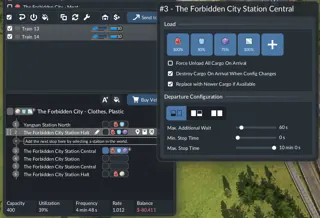
Transport Fever 3 Full Load Any vs All: Why a Vehicle Keeps Waiting
Separate transfer speed from departure rules. Understand Any and All for trains and ships, then test a stop without waiting for scarce cargo.
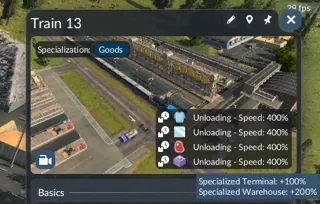
Transport Fever 3 Slow Loading: Platform Length and Cargo Specialisation Checks
Find the loading-speed penalty before buying faster trains. Check platform length and matching vehicle, terminal and warehouse handling.

Transport Fever 3 Industry Closing: What Stops the Countdown?
Check the closure notification and restore actual industry activity before the timer expires. Sending a vehicle past the site is not the same as producing or shipping goods.
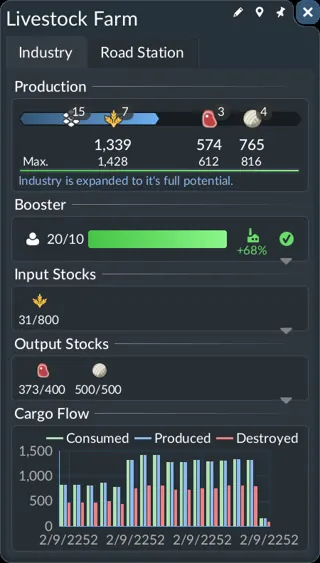
Transport Fever 3 Worker Booster Stops: Check Arrivals Before Expanding Freight
Inspect the industry worker list and recurring passenger arrivals. A freight upgrade cannot keep a worker boost active without workers reaching the site.
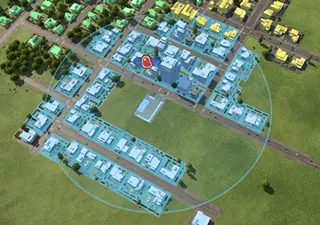
Transport Fever 3 Stop Nearby but No Passengers: Check the Walking Path
Cargo coverage and passenger access use different checks. Read the station highlighting, then inspect the walking route and the destination before adding buses.
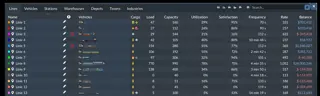
Transport Fever 3 Frequency vs Rate: Read the Line Statistics Before Adding Vehicles
Frequency measures the gap between vehicles; Rate is yearly transport per station. Compare those columns with load, utilisation and balance to identify what the line needs.
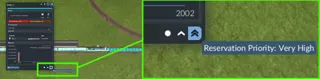
Transport Fever 3 Train Priority Buttons Missing: Open the Line Details Window
Find the circle and chevron priority controls in the line details window, understand reservation priority and test a shared junction without expecting automatic overtaking.
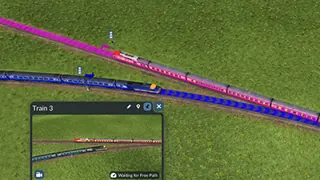
Transport Fever 3 Trains Deadlocked at a Junction: Leave Full-Train Clearance
Compare a blocked and cleared junction in real game screenshots. Move the waiting position clear of the switch and distinguish a deadlock from a normal red signal.

Transport Fever 3 No Path After One-Way Signals: Check the Return Route
Inspect signal direction and the actual One-way setting, then trace both station journeys. Separate a forbidden route from an occupied reserved path.

Transport Fever 3 Junction Traffic Jam: Fix Lane Turns with the Crossing Tool
Audit a blocked turn lane by lane. Use the Crossing tool, preserve the required exits and verify a full turn before widening the road.
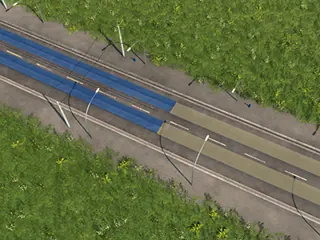
Transport Fever 3 Town Changes Broke Your Tram Line: Check Road Ownership
Find the street segment changed by town growth, restore its tram connection and protect the critical corridor with player ownership. Includes costs and limits.
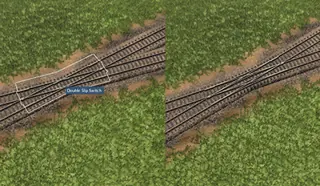
Transport Fever 3 Crossing Will Not Switch Tracks: Build a Double Slip
A rail crossing is not automatically a switch. Inspect the crossing angle, enable Double Slip and check both routes before changing signals.
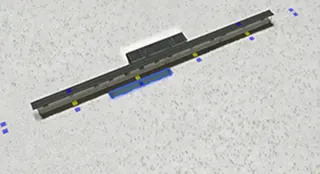
Transport Fever 3 Extend a Station Without Deleting It: Configure and Module Markers
Use Configure to add station modules, inspect blue placement markers and keep the bulldozer inside construction mode when removing one part.
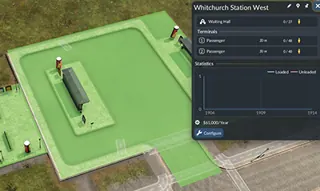
Transport Fever 3 Overcrowded Station: Check Waiting Hall Capacity
Read Waiting Hall and platform counts, add the right passenger space and separate a cramped station from a service that cannot clear its queue.

Planet Zoo 2: How to Edit Aquarium Height and Shape After Filling It
Box the animals, drain the aquarium, edit the empty perimeter and check water conditions before returning the occupants.
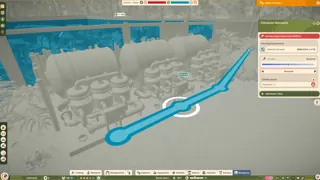
Planet Zoo 2 Aquarium Water Dirty? Check Filtration and Salinity
Connect the Staff Gate node, check powered filtration capacity against demand, and distinguish dirty water from the wrong salinity.

Planet Zoo 2 Keepers Not Feeding? Check Tasks, Food and Hut Access
Trace feeding from the keeper’s task checkbox to a powered, reachable Keeper Hut and a species-compatible feeder.

Planet Zoo 2 Shelters Missing or Not Counting? Check These Two Things
Find the shelter category and Essentials filter, then check usable cover with the Shelter Heatmap. Bedding alone does not prove there is enough shelter.

Planet Zoo 2: How to Edit Existing Paths with Edit Widgets
Change an existing path border with Edit Widgets; use the drawing tools for new ground and check the path type before rebuilding.

Planet Zoo 2 Animals Not Moving or Trading? Check These Requirements
Separate a transport queue from trade ineligibility: check the Trade Centre, staff route, destination gate and the animal’s life stage and health.
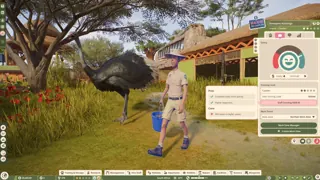
Planet Zoo 2 Work Zones and Training: Fix Long Staff Walks
Create compact work zones, understand the colour overlay and outside-zone facility fallback, then train staff without overlooking rest and salary.
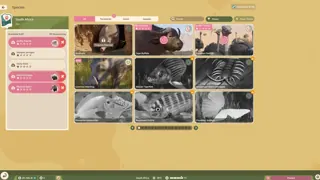
Planet Zoo 2 Research Guide: Missing Enrichment and Thriving Unlocks
Separate Species and Enrichment research, assign a keeper or vet, and identify care duties or Wildlife Reserve requirements blocking progress.
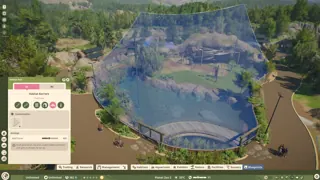
Planet Zoo 2 Aviary Guide: Add a Roof and Fix Low Flyable Area
Build a valid bird habitat, generate its roof with the Roof Tool, and use Roof Supports to address flying-space requirements.
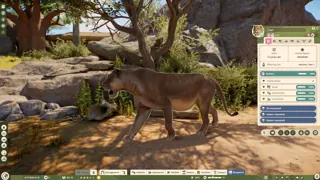
Planet Zoo 2 Animals Not Breeding? Check Seasons, Nests and Contraception
Check breeding eligibility before buying more animals: age, mating season, contraception, accessible nests and the chosen pair’s genetics.
 Darlom · CC BY
We Were Here Tomorrow Glove Training: All Cable Targets
Trace the red plate, yellow button and high blue target, coordinate the two prototype tools and start Magnetronic Transit together.
 Darlom · CC BY
We Were Here Tomorrow Laser Crystals: Correct Order
Identify the real Pingosius Crystalis, route through Rupium and Cattonimus in order, and finish at the emitter without accepting a matching beam colour as proof.
 Darlom · CC BY
We Were Here Tomorrow Six Rings: 4–1–5 Button Order
Count the six blades from the top, keep the clue chain held and match the three screens to the correct ring buttons without carrying on after a reset.
 Darlom · CC BY
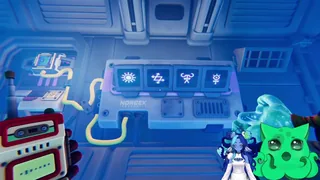
We Were Here Tomorrow PAT Lock: Symbols & Handle Settings
Match the current four-symbol set, read the shuffled meter numbers and map them to the three handles without carrying an old answer across a reset.
 Darlom · CC BY
We Were Here Tomorrow Cargo Elevator: Both Keys & Many Ways
Lower the hanging fuse, reach the office monkey bars and hook both lift keys, with the Many Ways decision before the fuse locks in.
 Darlom · CC BY
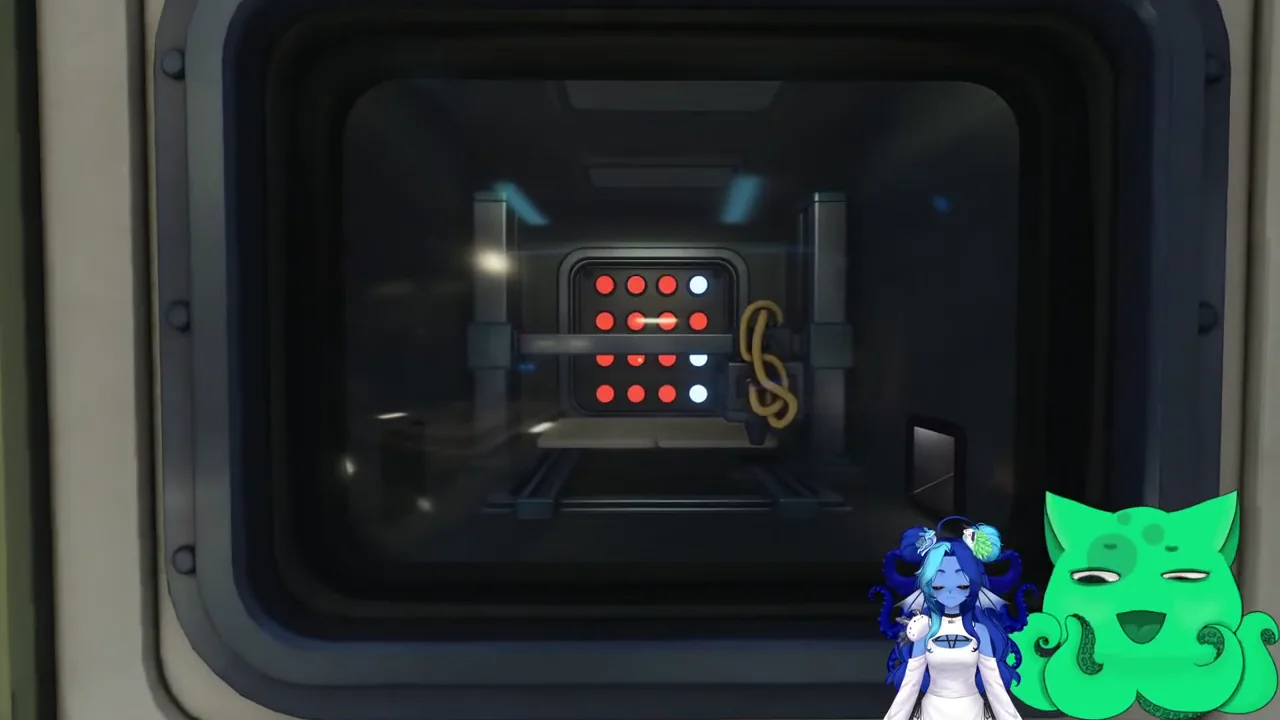
Printer grid: get the green key card
Read the cabinet pattern by row and column, guide the miniature explorer over the five controls and recover a miscounted cursor without losing the solution.
 Darlom · CC BY
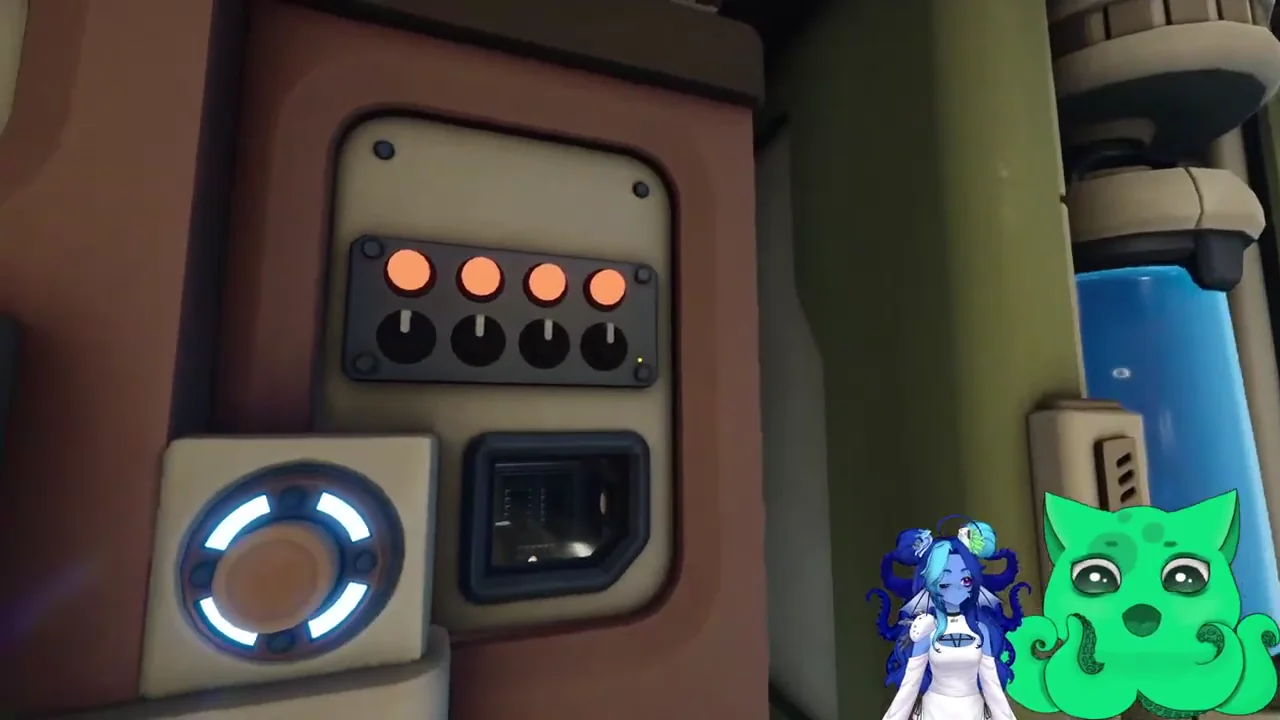
Floppy doors: align both dial panels
Start the machine with its cartridge, compare one large/small dial pair at a time and finish both groups before looking for the printer pattern.
 Darlom · CC BY
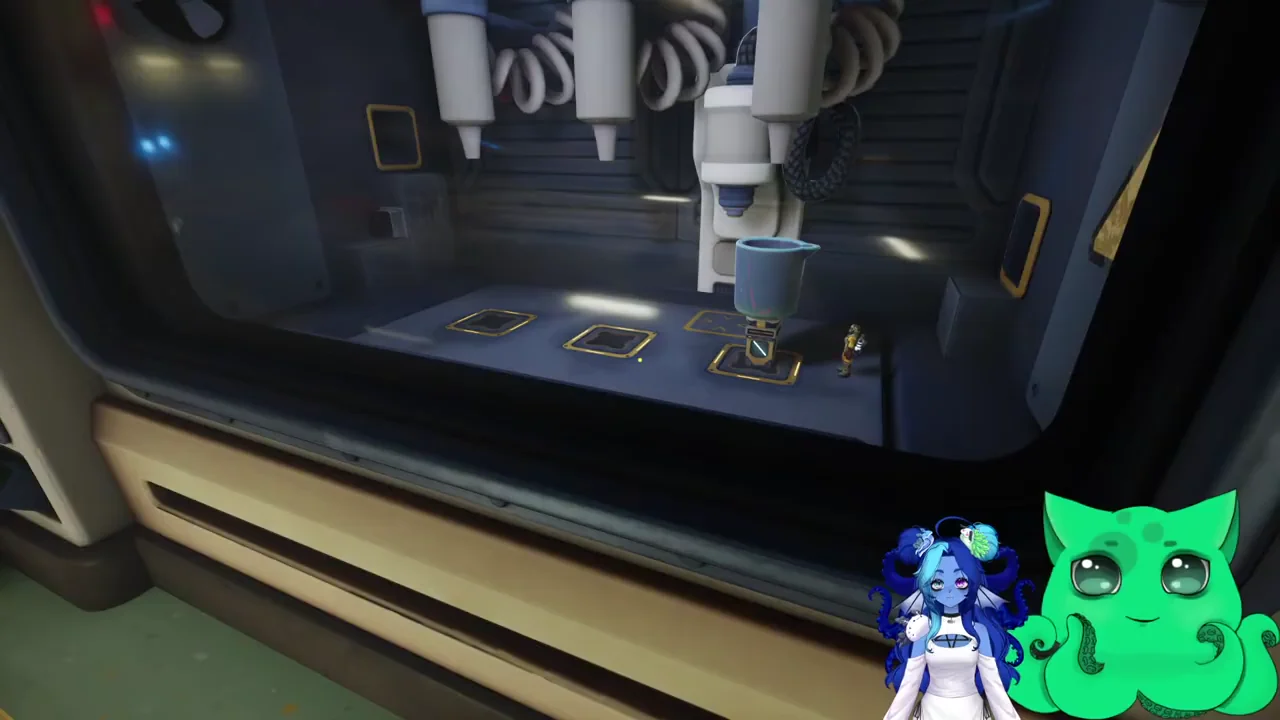
Resin recipe: selector & nozzle order
Mix Styrene, Acrylonitrile, Butadiene and Styrene with a four-dose checklist, correct cup placement and a clean recovery from an emptied mixture.
 Darlom · CC BY
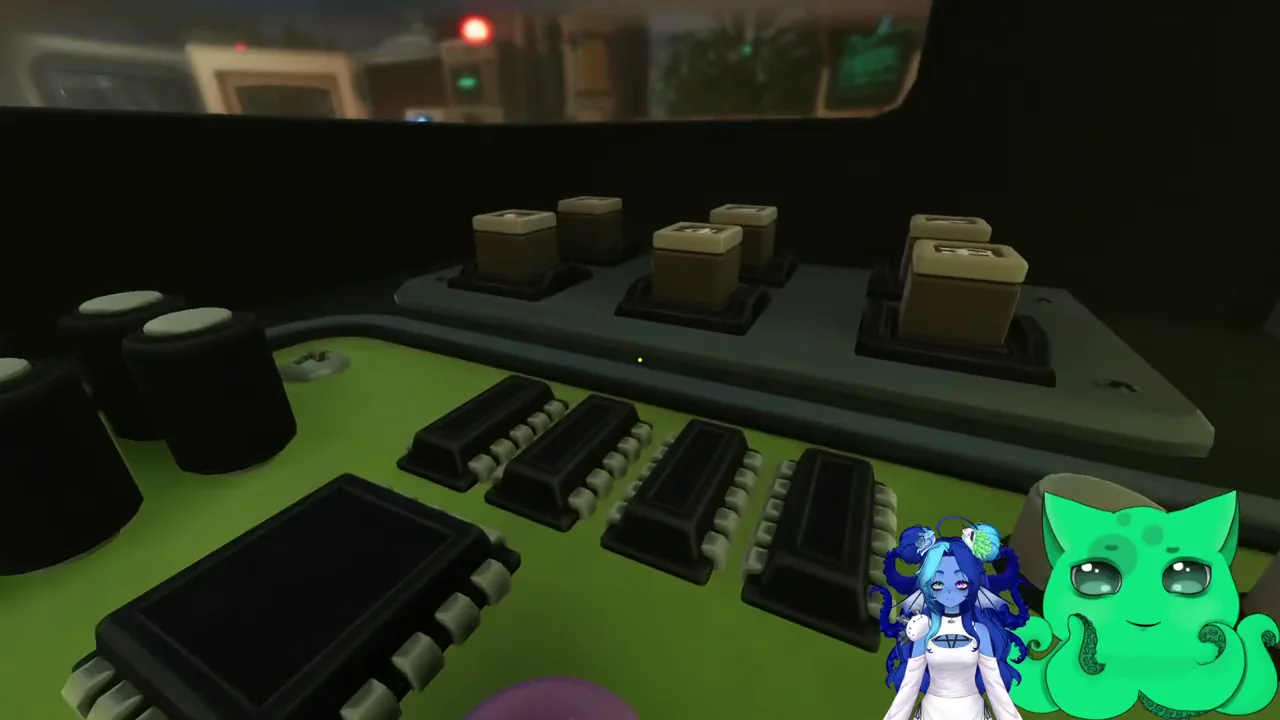
Circuit board: all six socket matches
Place the six circuit components by colour pair, solve the ambiguous sockets by elimination and check the board before moving to resin mixing.
 Darlom · CC BY
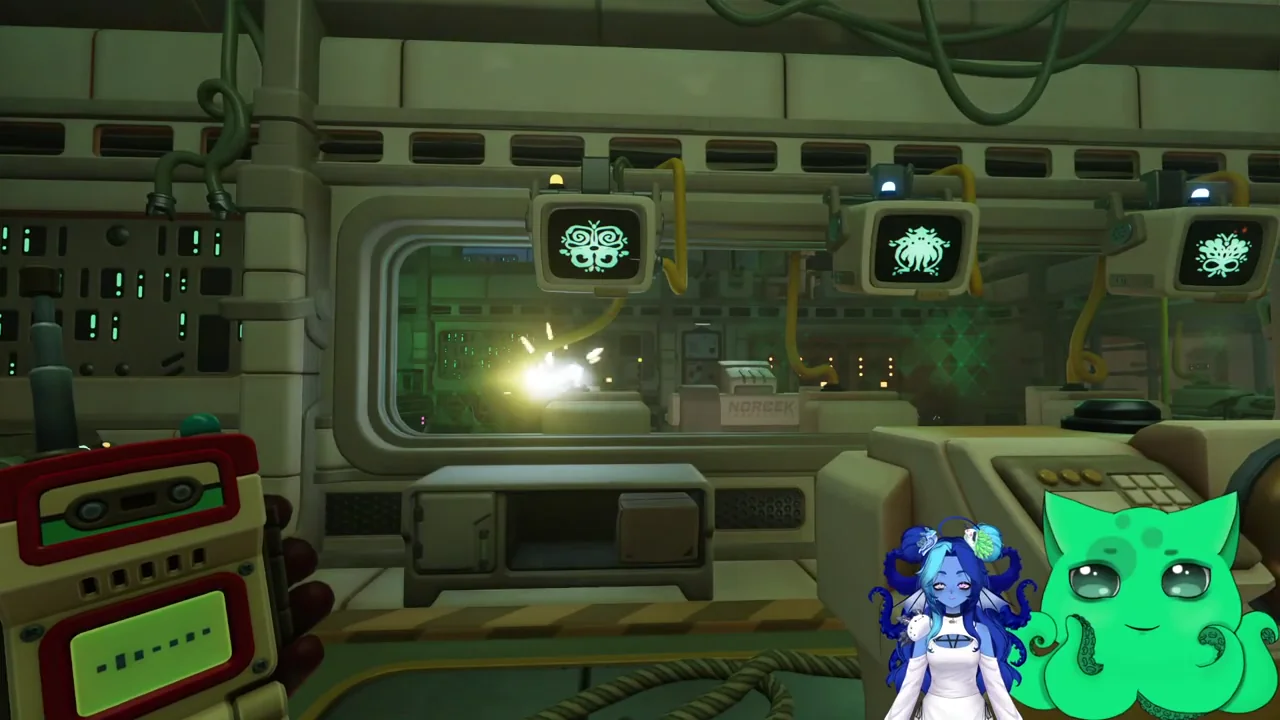
Wellness Check: symbols & devices
Solve both opening tests with the current screen sequence, clear device callouts and a clean restart after a rejected attempt.

Dressmaker Fast Trim Placement: How to Enable It
Find Fast Trim Placement in Pause Menu → Gameplay, then select, extend and duplicate trim. Includes zoom, pan and changed tilt settings.
Dressmaker Colour and Fabric Requirements After Build 443
Check smaller components as well as the bodice and skirt, compare material previews, and read requirement limits under the Build 443 weighting change.

Dressmaker: How to Change Thread Color at the Sewing Machine
Click a coloured spool beside the sewing machine to change thread color. Check the feeding thread, then continue sewing; fabric color is changed separately.
No Customers in Dressmaker: Ring the Bell and Check Open Requests
Ring the bell for the next customer, inspect the sketchbook’s other pages for unfinished commissions, and check the hand-in before reporting stalled progress.
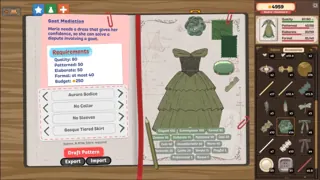
Dressmaker Fabric Preview: Read the Brief, Compare Swatches, Then Draft
Plan components and fabric swatches in the sketchbook, compare minimum and maximum requirements, then draft the pattern once the design is ready.

Dressmaker Beginner Guide: Design, Cut, Sew and Deliver
Follow the request, sketchbook, cutting, sewing and photo-preview hand-in with a visual workflow.

Dressmaker Achievements: All 32 Requirements and a Completion Plan
Check all 32 official Dressmaker achievement requirements, protect the Vivian dialogue choice, and separate campaign progress from strict single-dress thresholds.
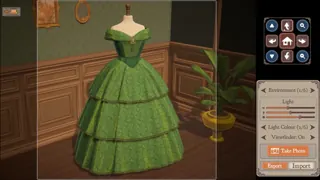
Make Money in Dressmaker: Sell Off-Rack Dresses and Track Costs
Complete an off-rack sale and compare its proceeds, consumed materials and wallet change before repeating the design.
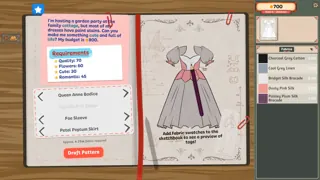
Dressmaker Early Commissions: Workwear and Three Funeral Dress Checks
Compare four named briefs, choose starting components and fabrics, and fix the specific colour, style or quality requirement that remains.

ARC Raiders Stiletto vs Bantam: Ammo, Shot Pace and Loadout Preparation
Prepare light ammo for Stiletto or heavy ammo for Bantam, pace ranged shots, and check condition, workbench crafting and repair costs before deployment.
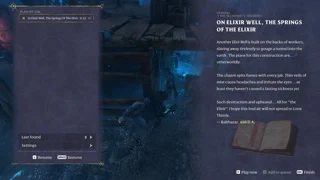
Enshrouded Lore Audio: Pause, Resume & Queue Notes
Use L to pause lore narration, check the playlist and queue the next note. Find the two Game settings and the hotfix for quiet voice-over.
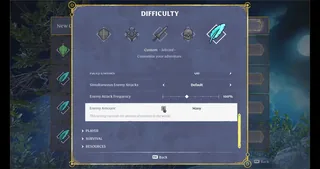
Enshrouded Automatic Enemy Counts: Nearby Party vs Distant Players
The 1.0 Automatic encounter setting scales enemy numbers with the party actively playing nearby. Players elsewhere in Embervale are not counted as part of that local party.

Infinite Craft recipes in order
A checked route from the starting elements.
No matching page yet. Try fewer words or clear the filters. We only list published content.